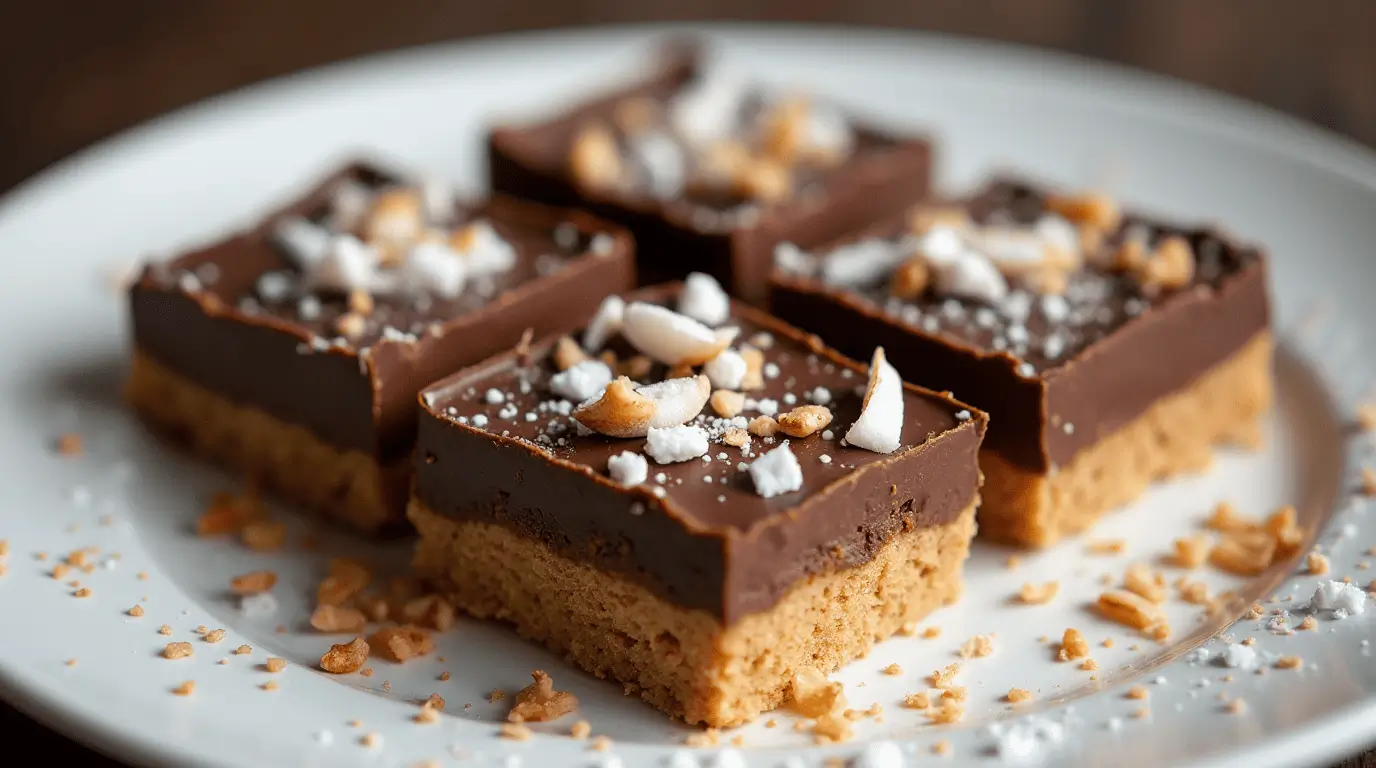
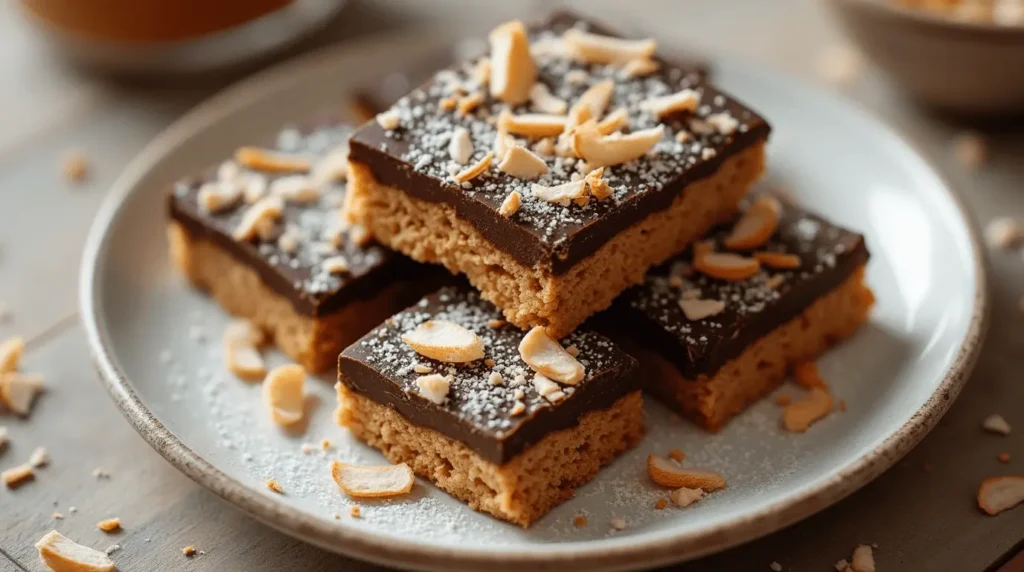
This Coconut Chocolate Bars Recipe is a show-stopper dessert that combines the tropical sweetness of toasted coconut with the rich decadence of smooth chocolate. Easy to prepare and bursting with flavor, these bars are perfect for any occasion—from casual gatherings to festive celebrations. Each bite delivers a delightful crunch, a chewy coconut center, and a luscious chocolate coating that will captivate your taste buds and warm your heart.
Introduction
Imagine a dessert that whisks you away to a tropical paradise with every bite—a treat that marries the nutty allure of toasted coconut with the luxurious creaminess of chocolate. The Coconut Chocolate Bars Recipe is designed for those who crave a sophisticated yet simple dessert that dazzles with its layers of texture and flavor. Whether planning a summer picnic, a festive party, or a quiet evening treat, these bars offer an irresistible balance of crunch and melt-in-your-mouth decadence. The beauty of this recipe lies in its simplicity; with just a handful of pantry staples, you can create a dessert that feels both indulgent and refreshingly light.
Table of Contents
Key Takeaways
In this recipe, you’ll discover a dessert that stands out for its incredible balance of flavors and textures. Here’s what you can expect:
- Flavor Explosion: Enjoy the tropical sweetness of toasted coconut paired with a rich, velvety chocolate coating.
- Ease of Preparation: With simple steps and minimal ingredients, this recipe is perfect for busy home cooks.
- Versatility: Ideal for parties, potlucks, or a special treat at home—these bars cater to both casual snacking and festive occasions.
- Customizable: Easily adjust ingredients to suit dietary needs, whether you prefer a gluten-free twist or a dairy-free version.
- Crowd-Pleaser: A dessert that appeals to all ages, and is guaranteed to impress family, friends, and guests alike.
Recipe Card
| Prep Time | Cook Time | Total Time | Servings | Calories per Serving |
|---|---|---|---|---|
| 20 minutes | 25 minutes | 45 minutes | 16 bars | ~250 kcal |
Ingrédients
| Ingredient | Quantity | Notes |
|---|---|---|
| Unsweetened Shredded Coconut | 2 cups | Toasted lightly for extra flavor |
| Semi-Sweet Chocolate Chips | 1 cup | Alternatively, use chopped dark chocolate |
| Sweetened Condensed Milk | 1 can (14 oz) | Adds sweetness and binds the layers |
| Butter | 1/2 cup | Melted; unsalted preferred |
| Vanilla Extract | 1 teaspoon | Enhances overall flavor |
| Graham Cracker Crumbs | 1 cup | For a crunchy, buttery base |
| Salt | 1/4 teaspoon | Balances the sweetness |

Step-by-Step Recipe Instructions for Coconut Chocolate Bars Recipe
Step 1 – Preparing the Base
Instructions:
Begin by preheating your oven to 350°F (175°C). In a medium mixing bowl, combine 1 cup of graham cracker crumbs with 1/2 cup of melted butter and 1/4 teaspoon of salt. Stir until the crumbs are evenly moistened. Next, press this mixture firmly into the bottom of an 8×8-inch baking dish lined with parchment paper. Use the back of a spoon or the bottom of a measuring cup to ensure an even, compact layer that will serve as a sturdy base for your bars.
Tip:
For an extra cohesive crust, press the graham cracker mixture tightly against the sides of the pan. This will not only help the base hold together better but also add a delightful crunch to every bite.
Step 2 – Creating the Coconut Mixture
Instructions:
In a separate large bowl, combine 2 cups of unsweetened shredded coconut with one 14-ounce can of sweetened condensed milk and 1 teaspoon of vanilla extract. Stir the ingredients together until the coconut is thoroughly coated with the condensed milk and the mixture becomes sticky and cohesive. If you haven’t toasted your coconut yet, consider doing so in a dry skillet over medium heat for 3-4 minutes until it turns a light golden brown and becomes fragrant; then let it cool before adding to the mixture.
Tip:
To intensify the coconut flavor, toast the shredded coconut lightly before mixing. Make sure not to burn it—a light, golden hue is all you’re aiming for.
Step 3 – Assembling the Bars
Instructions:
Evenly spread the coconut mixture over the prepared graham cracker base in your baking dish. Use a spatula to smooth the top and press the mixture down gently to form a uniform layer. This will ensure that the bars have a consistent texture and that the flavors meld together perfectly. Once the layer is evenly spread, place the baking dish in the preheated oven.
Tip:
For best results, press the coconut mixture firmly into the base. A well-compacted layer will hold its shape better once cooled and make cutting into neat bars much easier.
Step 4 – Baking the Coconut Layer
Instructions:
Bake the dish in the preheated oven for about 25 minutes. The heat will allow the condensed milk to bind with the coconut, creating a delicious, chewy texture. Keep an eye on the dish—once the edges start to turn a light golden color, your coconut layer is likely done. Remove the dish from the oven and allow it to cool completely at room temperature, or place it in the refrigerator for a faster setting.
Tip:
If you’re in a hurry, chilling the baked mixture in the fridge for about 15 minutes can help it firm up more quickly, making it easier to cut into bars later.
Step 5 – Melting the Chocolate Coating
Instructions:
While the coconut layer cools, prepare the chocolate coating. In a microwave-safe bowl, combine 1 cup of semi-sweet chocolate chips with an optional 1 tablespoon of butter (this adds extra smoothness to the chocolate). Microwave in 30-second bursts, stirring well after each interval until the chocolate melts completely and becomes smooth. Alternatively, you can melt the chocolate using a double boiler on the stovetop. Stir frequently to avoid burning the chocolate.
Tip:
If you notice the chocolate beginning to thicken or seize, add a few drops of milk or coconut oil to restore its smooth consistency. Work quickly, as the chocolate can start to set at room temperature.
Step 6 – Coating the Bars
Instructions:
Once the coconut layer has cooled and set, remove it from the oven (or refrigerator) and use a sharp knife to cut it into 16 even bars. Next, using a fork or a dipping tool, dip each bar into the melted chocolate, ensuring that all sides are thoroughly coated. Arrange the chocolate-coated bars on a baking sheet lined with parchment paper. If you prefer, you can drizzle the chocolate over the bars instead of fully dipping them for a more rustic look.
Tip:
If the chocolate begins to harden before you finish dipping all the bars, gently reheat it in the microwave for a few seconds. This will ensure an even coating on every bar.
Step 7 – Final Chilling and Serving
Instructions:
After coating, transfer the baking sheet to the refrigerator and chill the bars for at least 20 minutes, or until the chocolate has fully set. Once firm, remove the bars from the fridge and allow them to sit at room temperature for about 5 minutes before serving. This short rest period allows the chocolate to soften slightly, making the bars easier to bite into and enjoy.
Tip:
For an extra crisp texture, serve the bars chilled. If you’re storing leftovers, keep them in an airtight container in the refrigerator to maintain their structure and flavor.
Notes
These Coconut Chocolate Bars are a versatile treat that can be customized to suit your taste. Here are some additional tips and variations:
- Ingredient Substitutions: For a dairy-free version, substitute the butter with coconut oil and use a dairy-free sweetened condensed milk alternative. Gluten-free graham cracker crumbs are also available if you have dietary restrictions.
- Extra Flavor: Consider adding a pinch of cinnamon or a few tablespoons of chopped nuts (such as almonds or pecans) to the coconut mixture for an added crunch and flavor boost.
- Serving Suggestions: These bars make a delightful dessert for dinner parties, potlucks, or as a special snack to share with family and friends. Pair them with a cup of coffee or tea for an extra indulgent treat.
- Storage: Keep any leftovers in an airtight container and refrigerate for optimal freshness. They will keep well for up to a week. For longer storage, you can freeze the bars and thaw them before serving.
- Presentation: To impress your guests, dust the bars lightly with powdered sugar or cocoa powder just before serving.
Nutrition Information
| Nutrient | Amount per Serving |
|---|---|
| Calories | 250 kcal |
| Total Fat | 12 g |
| Saturated Fat | 7 g |
| Cholesterol | 30 mg |
| Sodium | 150 mg |
| Total Carbohydrates | 30 g |
| Dietary Fiber | 2 g |
| Sugars | 20 g |
| Protein | 4 g |
Tools and Equipment Needed
| Equipment | Purpose |
|---|---|
| Mixing Bowls | For combining ingredients and preparing mixtures |
| Microwave or Double Boiler | For melting the chocolate smoothly |
| Spatula | For stirring, spreading, and smoothing mixtures |
| 8×8-inch Baking Dish | For forming the base and coconut layer |
| Parchment Paper | For lining the dish and ensuring easy removal |
| Knife | For cutting the set mixture into uniform bars |
| Fork or Dipping Tool | For coating the bars in melted chocolate |
The History of Recipe
The origins of these Coconut Chocolate Bars can be traced back to the iconic “magic cookie bars” that emerged in American cookbooks during the mid-20th century. Initially celebrated for their simplicity and indulgence, these bars were a symbol of accessible homemade desserts in an era when cooking from scratch was the norm. Over time, the recipe evolved as families experimented with variations, incorporating tropical ingredients like coconut to add a unique twist. The fusion of rich chocolate and coconut soon became popular not only for its taste but also for the cultural blend it represented—a nod to both traditional American comfort food and exotic flavors from afar. Today, these bars are cherished as a nostalgic yet modern dessert that bridges generations and culinary traditions.
Common Mistakes to Avoid
When preparing these Coconut Chocolate Bars, a few common pitfalls can detract from the final product. One frequent error is under-pressing the graham cracker crust, which can lead to a crumbly base that falls apart when cut. Overbaking the coconut layer is another mistake; too much heat can dry out the mixture, compromising its chewy texture. Incorrect measurements, especially with the sweetened condensed milk, can throw off the balance of sweetness and moisture, resulting in a bar that is either too sticky or too dry. Additionally, uneven coating of the chocolate can occur if the bars are not fully chilled before dipping, leading to an inconsistent finish.
Why You’ll Love This Recipe
- Flavor Profile: Savor the tropical sweetness of toasted coconut combined with the rich, velvety taste of smooth chocolate. The aroma is inviting and decadently indulgent, making every bite a mini-vacation for your taste buds.
- Ease of Preparation: With simple steps and minimal ingredients, this recipe is designed for both novice bakers and seasoned chefs. It comes together quickly and requires just basic kitchen tools, making it an ideal dessert for busy days.
- Versatility: Whether it’s a festive gathering, a casual snack, or an elegant dessert for a dinner party, these bars can be easily adapted to suit any occasion. They are also highly customizable, allowing you to experiment with add-ins like nuts or spices to create your unique twist.
Key Ingredients and Substitutions
Key ingredients like unsweetened shredded coconut sweetened condensed milk, and quality chocolate are essential for achieving the perfect balance of flavor and texture in these bars. The shredded coconut provides a chewy, nutty base, while the condensed milk binds the layers with its rich sweetness, and the chocolate offers a smooth, decadent finish. If you have dietary restrictions or limited ingredient availability, there are several alternatives you can use. For example, substitute dairy-based condensed milk with a coconut-based version for a vegan twist, or opt for gluten-free graham cracker crumbs if needed. High-quality unsalted butter and pure vanilla extract also enhance the overall taste, so choosing reputable brands will make a noticeable difference in your final product.
Culinary Magic: The Pleasure of Making This Recipe
Every step of making these bars exudes a sense of wonder and creativity.
From the perfectly pressed graham cracker crust to the richly bound coconut layer, each stage is a celebration of flavor.
Dipping the bars in smooth, melted chocolate transforms them into little works of art.
In just a few minutes, simple ingredients unite into a dessert that brings joy to every bite.
Troubleshooting Common Issues
[Problem]: The coconut layer appears too dry.
Solution: Ensure you measure the sweetened condensed milk accurately and mix it thoroughly with the coconut. If needed, add a splash more to achieve a stickier consistency before baking.
[Problem]: The chocolate coating is uneven or clumpy.
Solution: Make sure the bars are fully chilled before dipping and reheat the chocolate gently if it begins to thicken. Stir frequently during the melting process to maintain a smooth consistency.
Expert Tips for Success
For best results, always use high-quality ingredients such as Eagle Brand sweetened condensed milk and Ghirardelli chocolate chips. Utilize a food processor for a finer texture of the coconut if desired, and be meticulous in pressing the graham cracker base firmly into your baking dish. Use an oven thermometer to confirm your oven’s temperature, ensuring even baking. Finally, never rush the cooling process—allow the bars to set completely before cutting or dipping them in chocolate for a flawless finish.
Variations and Customizations
This recipe is highly adaptable to suit various dietary restrictions and flavor preferences. For a vegan option, substitute traditional sweetened condensed milk with coconut condensed milk and choose dairy-free chocolate. For a crunchier texture, incorporate chopped nuts such as pecans or walnuts into the coconut mixture. If you prefer a less sweet dessert, reduce the amount of condensed milk slightly or try a sugar-free alternative. Spice enthusiasts can experiment by adding a pinch of cinnamon or nutmeg to the coconut layer for an extra flavor kick.
Storing Leftovers (Refrigeration/Freezing)
To maintain the best texture and flavor, store any leftover bars in an airtight container in the refrigerator for up to one week. For longer storage, wrap the bars individually in plastic wrap, then place them in a freezer-safe container and freeze them for up to three months. When ready to enjoy, allow the bars to thaw in the refrigerator overnight, or reheat them briefly in the microwave—about 10-15 seconds—to restore their delightful texture without melting the chocolate.
Serving Suggestions
For a well-rounded dessert experience, serve these Coconut Chocolate Bars alongside a freshly brewed cup of coffee or a refreshing iced tea. Consider garnishing with a light dusting of powdered sugar or additional toasted coconut flakes for an elegant presentation. They pair beautifully with a scoop of vanilla ice cream or a drizzle of caramel sauce for extra decadence. Whether for brunch, a casual snack, or an impressive dessert for special occasions, these bars are sure to delight every palate.
Frequently Asked Questions
Q1: Can I substitute sweetened condensed milk with a dairy-free alternative?
Absolutely. If you prefer a dairy-free version, you can use homemade coconut condensed milk. Simply simmer full-fat coconut milk with a sweetener such as coconut sugar or maple syrup until it thickens and reduces by about half. This substitute will provide the same binding and sweetness to your coconut layer while keeping the recipe vegan-friendly.
Q2: How can I ensure that the graham cracker crust holds together firmly?
The key to a sturdy graham cracker crust is proper mixing and pressing. Use high-quality graham cracker crumbs and combine them thoroughly with melted unsalted butter. Press the mixture firmly into the baking dish, making sure to compact it evenly. You can also chill the crust for 10 minutes before adding the coconut layer to help it set better.
Q3: Can I melt the chocolate in the microwave, and what is the best method?
Yes, you can melt the chocolate in the microwave. Place the chocolate chips (and butter, if using) in a microwave-safe bowl and heat in 30-second increments. Stir well between each interval to prevent the chocolate from seizing or burning. Alternatively, you can use a double boiler for a more controlled melt. The key is to heat gently and stir frequently for a smooth, glossy finish.
Q4: How can I reduce the sweetness of the bars if I prefer a less sweet dessert?
If you’d like a less sweet version, consider reducing the amount of sweetened condensed milk by about 25% or mixing in a small portion of unsweetened coconut cream to balance the sweetness. You might also add a pinch of salt or a dash of cinnamon to enhance the flavor complexity without adding extra sugar. Taste as you go to adjust the balance according to your preference.
Q5: How should I store these bars, and what is the best way to reheat them?
To keep your bars at their best, store them in an airtight container in the refrigerator, where they will maintain their texture for up to one week. For longer storage, wrap each bar individually in plastic wrap and freeze them for up to three months. When ready to enjoy, allow the bars to thaw in the refrigerator overnight, or reheat them in the microwave for 10-15 seconds to soften the chocolate coating without melting it entirely.
Related Recipes
If you enjoyed the rich blend of coconut and chocolate in these bars, you might also love our Coconut Bliss Brownies, which add an extra layer of fudgy indulgence with a tropical twist. Consider trying our Toasted Coconut Macaroons for a light, chewy treat or the Tropical Lemon Bars that balance zesty citrus with the creamy sweetness of coconut. For those who appreciate a bit of crunch, our Crispy Coconut Rice Bars offer a delightful mix of textures and flavors. You can also explore our Vegan Coconut Cookies, a healthier yet equally delicious alternative. Each of these recipes shares the common thread of tropical inspiration and versatile flavors, perfect for any occasion.
Conclusion: A Delicious Intersection of Tradition and Modernity
In summary, this Coconut Chocolate Bars Recipe is a beautiful marriage of time-honored ingredients and modern culinary creativity. The crunchy graham cracker crust, chewy coconut layer, and smooth chocolate coating work in perfect harmony to deliver an unforgettable taste experience. This dessert not only evokes nostalgic memories of classic homemade treats but also introduces innovative twists that cater to today’s diverse palate. The process is straightforward yet rewarding, making it accessible to both novice bakers and seasoned chefs alike. Every bite is a celebration of tradition reinvented, inviting you to savor the fusion of past and present in every delicious morsel.
Call to Action
Ready to make this delicious Coconut Chocolate Bars Recipe?
Give it a try and let us know how it turns out!
We’d love to hear about your twists, tips, and serving ideas in the comments below.
Share your experiences and any creative variations you come up with to inspire fellow food enthusiasts.
Your feedback is invaluable and helps us continue to create recipes that bring joy and innovation to your kitchen.
So grab your ingredients, roll up your sleeves, and dive into the culinary magic—your next favorite dessert awaits!