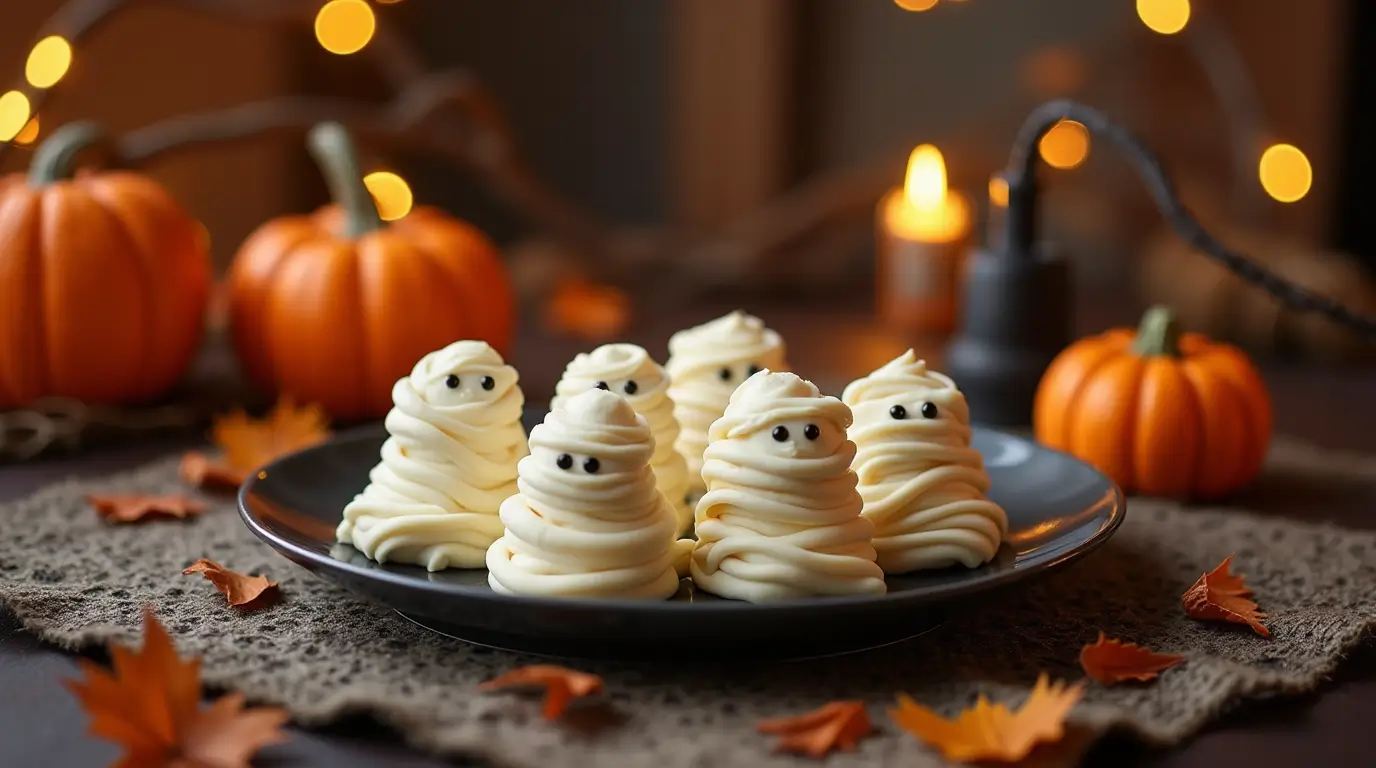
Imagine biting into a delightfully crunchy, sweet treat that transforms ordinary snack time into a spooky celebration—our Halloween Mummy Treats blend nostalgia, creativity, and irresistible flavor. With each bite, the satisfying crunch of Rice Krispies meets the soft, chewy marshmallow texture, enhanced by the smooth drizzle of white chocolate and playful candy eyes that bring these edible mummies to life. Whether you’re hosting a Halloween party or simply in the mood for a festive twist on a classic dessert, this recipe promises ease of preparation and an enchanting taste experience that appeals to both kids and adults alike.
Introduction
The excitement of Halloween is all about creativity, spookiness, and a dash of nostalgia. I still remember the thrill of my very first Halloween celebration when the air was filled with laughter, eerie tales, and the unmistakable aroma of homemade treats. One of the most memorable highlights was when my mom unveiled her signature “mummy treats” on a beautifully decorated table. Each treat looked like a tiny, playful mummy, wrapped in a thin layer of white chocolate and adorned with quirky candy eyes. This magical experience not only ignited my love for festive cooking but also sparked a lifelong passion for creating treats that tell a story. The memory of that enchanting evening still inspires me every time I make these delightful Halloween Mummy Treats.
Table of Contents
Key Takeaways
- Unique Flavor Profile: Enjoy the delightful crunch of Rice Krispies, the softness of melted marshmallows, and the creamy finish of white chocolate drizzles.
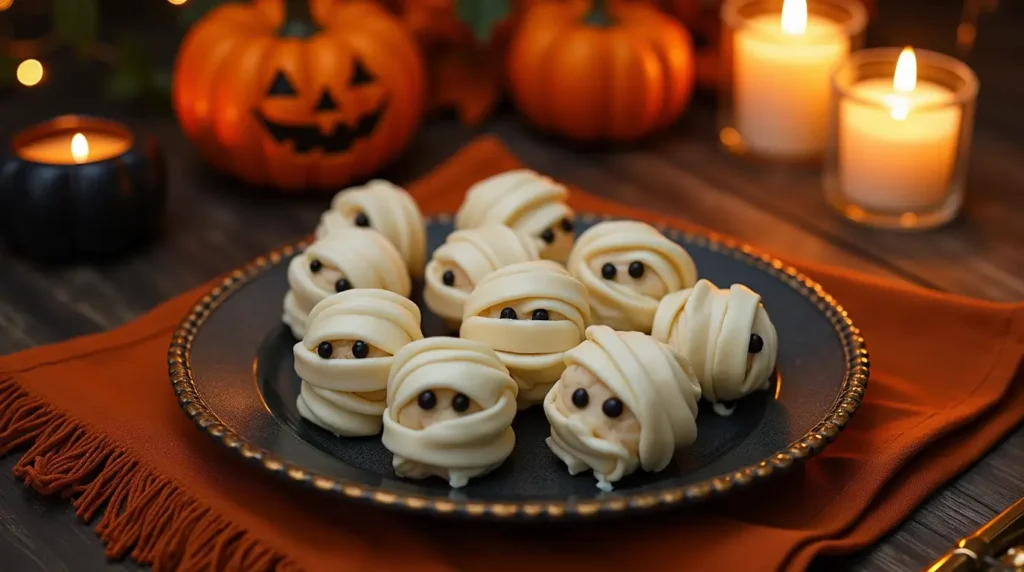
- Festive Presentation: Each treat is transformed into a charming mummy with strategically placed candy eyes, perfect for adding a whimsical touch to any dessert table.
- Kid-Friendly & Versatile: Ideal for family gatherings, Halloween parties, or a fun afternoon snack, with easy modifications available for various dietary needs.
- Ease of Preparation: With straightforward steps and common ingredients, this recipe ensures a quick and enjoyable cooking experience without sacrificing creativity.
Recipe Card
| Prep Time | Cook Time | Total Time | Servings | Calories per Serving |
|---|---|---|---|---|
| 20 minutes | 15 minutes | 35 minutes | 24 treats | 120 calories approx. |
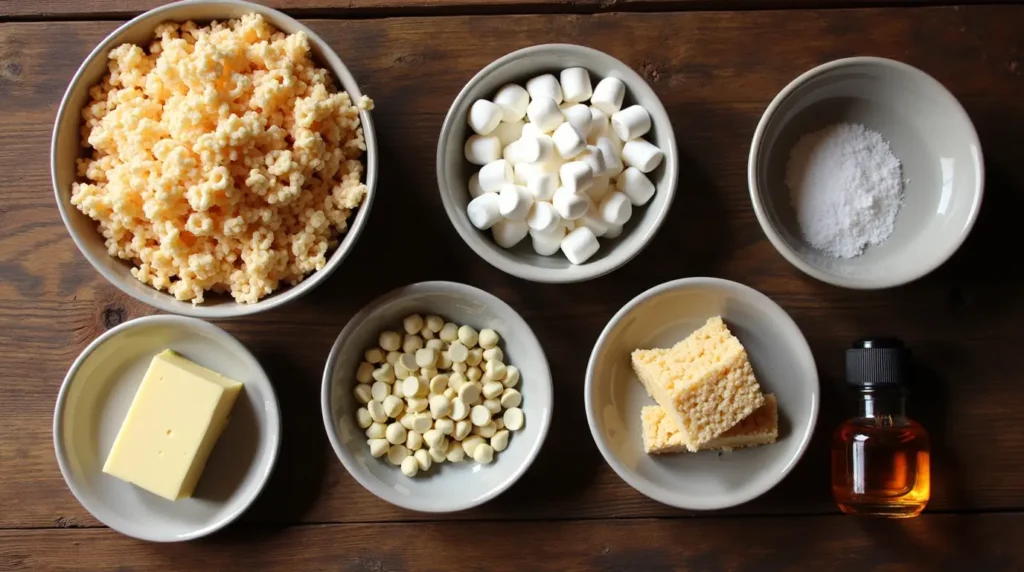
Ingrédients
| Ingredient | Quantity | Notes |
|---|---|---|
| Rice Krispies cereal | 4 cups | Use gluten-free version if preferred |
| Large marshmallows | 3 cups (approx. 50) | Uniform size ensures even melting and mixing |
| Unsalted butter | 3 tablespoons | Use at room temperature for smoother melting |
| White chocolate chips | 2 cups | Can substitute with chopped white chocolate |
| Candy eyes | 20 pieces | Can substitute it with chopped white chocolate |
| Vanilla extract | 1 teaspoon | Enhances the overall flavor profile |
| Salt | 1/4 teaspoon | A pinch to balance the sweetness |
Step-by-Step Recipe Instructions for Halloween Mummy Treats
Step 1: Preparing the Rice Krispies Mixture
Instructions:
Begin by placing the 4 cups of Rice Krispies cereal into a large mixing bowl. In a medium saucepan over low heat, melt the 3 tablespoons of unsalted butter until it becomes fully liquid and slightly bubbly. Add the 3 cups of large marshmallows and stir continuously until they are completely melted, forming a smooth, gooey mixture. Remove the saucepan from the heat, then stir in 1 teaspoon of vanilla extract and a pinch (1/4 teaspoon) of salt to enhance the flavor. Gradually pour the warm mixture over the Rice Krispies in the bowl, gently stirring until every piece is evenly coated.
Tip: Work quickly but carefully, as the mixture begins to set as it cools. A silicone spatula can help scrape every bit of the gooey marshmallow mixture from the pan.
Step 2: Shaping the Treats
Instructions:
Lightly grease a large, flat surface or a baking sheet with a bit of butter or non-stick spray. Transfer the sticky Rice Krispies mixture onto this surface and press it into an even, compact layer about 1/2-inch thick using your hands or a spatula. Use a sharp knife or cookie cutter to cut the pressed mixture into rectangular or square shapes, each roughly 2 inches by 3 inches. Arrange these pieces on a clean plate or another baking sheet, ensuring there is enough space between them for the next steps.
Tip: If the mixture is too sticky, lightly oil your hands or use parchment paper to aid in transferring the pieces without them clinging.
Step 3: Drizzling the White Chocolate
Instructions:
Place the 2 cups of white chocolate chips in a microwave-safe bowl. Microwave the chocolate on medium power in 20-second bursts, stirring after each, until it’s completely melted and smooth. This melted chocolate will serve as the “mummy wrappings” for your treats. Using a spoon or a small piping bag fitted with a fine tip, drizzle the melted chocolate over each Rice Krispies treat. Aim for thin, winding drizzles that mimic the look of mummy bandages, leaving some areas bare for the candy eyes.
Tip: For extra control over the drizzling, transfer the melted chocolate to a plastic sandwich bag and snip a small corner to create a makeshift piping bag.
Step 4: Adding the Finishing Touches with Candy Eyes
Instructions:
After drizzling the chocolate, let the treats sit for about 5 minutes at room temperature, or place them in the refrigerator for 2-3 minutes to firm up the chocolate. Once the chocolate has set enough to hold its shape, gently press two candy eyes into the chocolate drizzle on each treat. Position them to create the illusion of a playful, spooky face, and for an authentic mummy look, consider placing the eyes slightly askew. Repeat until all treats are adorned with their unique, quirky expressions.
Tip: Work in a well-lit area to ensure the candy eyes are symmetrically placed. If you’re feeling extra creative, use edible markers to add subtle details around the eyes.
Step 5: Final Setting and Presentation
Instructions:
Allow your Halloween Mummy Treats to rest undisturbed for another 10 minutes, ensuring that the white chocolate fully hardens and adheres to the Rice Krispies base. Avoid stacking the treats during this period to maintain their crisp texture. Once set, carefully transfer them to a serving platter. For an added festive flair, sprinkle a few edible glitter dust or tiny Halloween-themed sprinkles over the treats before serving. This extra touch will catch the light and enhance the spooky, celebratory vibe of your dessert table.
Tip: If you plan on serving the treats later, cover them loosely with plastic wrap to prevent moisture from dulling the chocolate’s finish.
Notes
These Halloween Mummy Treats are not only a hit during the spooky season but can also be enjoyed any time you crave a fun, nostalgic dessert. If you’re hosting a large gathering, consider doubling the recipe and displaying the treats in a tiered arrangement for a stunning centerpiece. For those with dietary restrictions, you can easily swap Rice Krispies for a gluten-free cereal and use dairy-free butter and white chocolate to accommodate vegan preferences. Experiment with additional toppings—such as crushed nuts or a drizzle of dark chocolate—to introduce new layers of flavor and texture. The key to success lies in working swiftly once the marshmallow mixture is ready, as its sticky nature requires prompt handling. Embrace the charming imperfections in the drizzles and candy eye placements, as they add character and authenticity to these homemade treats. Enjoy the process as much as the final product, and feel free to put your unique spin on this classic recipe!
Nutrition Information
| Nutrient | Amount per Serving |
|---|---|
| Calories | 120 |
| Total Fat | 4g |
| Saturated Fat | 2.5g |
| Cholesterol | 10mg |
| Sodium | 75mg |
| Total Carbohydrates | 20g |
| Dietary Fiber | 0.8g |
| Sugars | 12g |
| Protein | 2g |
Tools and Equipment Needed
| Equipment | Purpose |
|---|---|
| Large Mixing Bowl | For combining the Rice Krispies and marshmallow mixture |
| Medium Saucepan | For melting butter and marshmallows |
| Spatula | For stirring and transferring the mixture |
| Microwave-Safe Bowl | For melting the white chocolate chips |
| Piping Bag or Spoon | For drizzling the melted chocolate |
| Sharp Knife/Cookie Cutter | For cutting the Rice Krispies mixture into shapes |
| Baking Sheet/Plate | For spreading and setting the treats |
The History of Recipe
The origin of Halloween treats dates back to the early 20th century when the fusion of traditional autumn harvest festivities with emerging pop culture led to the creation of playful and themed desserts. In communities across the United States, families began experimenting with everyday ingredients, transforming them into imaginative treats that celebrated the spirit of the season. The concept of the “mummy treat” emerged from the combination of nostalgic snack foods with the eerie motifs of Halloween. Over time, these treats evolved from simple, homemade concoctions into beloved staples at festive gatherings, representing both culinary innovation and cultural celebration. Each bite of a Halloween Mummy Treat carries echoes of traditions and modern twists, making it a delicious bridge between history and contemporary creativity.
Common Mistakes to Avoid
When preparing Halloween Mummy Treats, avoid common pitfalls such as overcooking the marshmallow mixture, which can result in a hard, rubbery texture. Incorrect ingredient measurements, especially with the butter and marshmallows, may alter the balance between crispiness and chewiness. Another frequent error is not working swiftly with the sticky mixture, leading to uneven coating and difficulty in forming shapes. Over-drizzling the white chocolate can overshadow the delicate taste of the cereal base while under-chilling the treats before adding the candy eyes might result in a messy presentation. Being mindful of these details ensures your treats turn out perfectly every time.
Why You’ll Love This Recipe
- Flavor Profile: Enjoy the delightful mix of crispy Rice Krispies, sweet marshmallows, and creamy white chocolate with every bite.
- Ease of Preparation: The recipe is designed for simplicity, allowing both beginners and experienced cooks to whip up a batch in no time.
- Versatility: These treats can be easily adapted to suit various dietary needs or customized with different toppings for unique occasions.
Key Ingredients and Substitutions
Every ingredient in these Halloween Mummy Treats plays a crucial role in achieving the perfect balance of texture and flavor. The Rice Krispies provide the necessary crunch, while the marshmallows lend a soft, gooey consistency that binds the cereal together. White chocolate not only adds sweetness but also acts as the “bandages” that give the treats their iconic mummy appearance. For those with dietary restrictions, consider using gluten-free cereal, dairy-free butter, or vegan marshmallows as suitable alternatives. These substitutions ensure that everyone can enjoy this festive treat without compromising on taste or presentation.
Culinary magic: the pleasure of making this recipe
Mix the cereal and marshmallow mixture with passion,
Shape each treat with care and a creative flair,
Drizzle the chocolate with precision and artistic zeal,
Adorn with candy eyes, then step back to admire your edible art.
Troubleshooting Common Issues
[Overcooked Marshmallow Mixture]: Lower the heat and stir continuously to prevent burning and ensure a smooth texture.
[Sticky Mixture Too Difficult to Shape]: Lightly oil your hands or use parchment paper to prevent sticking and maintain shape consistency.
Expert Tips for Success
For consistently excellent results, use high-quality ingredients such as artisanal white chocolate and fresh marshmallows. Ensure your workspace is well-organized before you begin, and work quickly when mixing the sticky components. Professional chefs recommend using a silicone spatula for easy mixing and transferring, as well as a plastic piping bag for controlled drizzling. Brands like [trusted local brands] often provide superior results, so don’t hesitate to invest in quality tools and ingredients.
Variations and Customizations
Experiment with alternative flavors by substituting white chocolate with dark or milk chocolate for a different taste profile. For vegan-friendly options, use plant-based ingredients like coconut oil and vegan marshmallows. You can also add a hint of spice, such as a pinch of cinnamon or nutmeg, to elevate the flavor further. Feel free to mix in other elements like crushed peppermint candies for a festive twist, making each batch uniquely yours.
Storing Leftovers (Refrigeration/Freezing)
Store any leftover Halloween Mummy Treats in an airtight container to maintain their crisp texture. For short-term storage, refrigerate for up to three days, ensuring the treats remain fresh and the chocolate stays firm. If you need to store them longer, place the treats in a freezer-safe container and freeze them for up to one month. To reheat, allow the treats to come to room temperature or warm them in a low-temperature oven for a few minutes to restore their ideal texture and flavor without melting the chocolate excessively.
Serving Suggestions
For an extra special presentation, serve your Halloween Mummy Treats alongside a warm cup of apple cider or a rich, spiced hot chocolate. Garnish the plate with fresh seasonal fruits like apple slices or a sprinkling of cinnamon for an aromatic touch. These treats also pair wonderfully with a side of savory snacks, creating a balanced spread that satisfies both sweet and salty cravings. Whether for a festive party or a casual family gathering, these serving suggestions ensure your dessert table is as inviting as it is delicious.
Frequently Asked Questions
Can I Substitute Rice Krispies with Another Cereal?
Absolutely! While Rice Krispies provide that classic, airy crunch, you can experiment with other cereals to suit your dietary needs or personal taste. For example, puffed rice cereal works similarly, or you might try gluten-free options like crispy quinoa or corn-based cereals if you have gluten sensitivities. Just ensure that whichever cereal you choose has a light texture to hold up well when mixed with melted marshmallows. Adjust the quantities slightly if needed, as some cereals may absorb the marshmallow mixture differently. This flexibility makes the Halloween Mummy Treats recipe incredibly adaptable for various dietary preferences and ingredient availabilities.
How Can I Make These Treats Vegan?
Transforming these treats into a vegan-friendly dessert is straightforward with a few smart swaps. Use vegan marshmallows, which are readily available in many health food stores or online, and substitute dairy butter with a plant-based alternative like coconut oil or vegan butter. Look for vegan white chocolate or simply use dark chocolate with a pinch of extra sweetness if white chocolate isn’t available. These substitutions maintain the treats’ delicious taste and texture, ensuring that everyone can enjoy a festive bite without compromising on ethical or dietary standards.
What Are Some Alternative Options for the Candy Eyes?
If you can’t find traditional candy eyes or wish to try something different, there are plenty of creative alternatives. Edible markers can be used to draw quirky eyes directly on the chocolate drizzle, or you can opt for small fondant shapes or even mini M&M’s. Another fun idea is to use small pieces of colored icing to create custom facial features. These alternatives not only work well visually but also allow you to customize the look of your Halloween Mummy Treats to better match your party theme or personal style.
How Do I Prevent the Treats from Becoming Too Sticky or Hard?
Maintaining the perfect texture for your Halloween Mummy Treats is all about timing and temperature control. Avoid overheating the marshmallow mixture; keep the heat low and stir continuously to prevent burning or crystallization. Once the mixture is ready, work quickly to coat the cereal evenly before it starts to set. If the mixture becomes too sticky, lightly oil your hands or use parchment paper for easier handling. Additionally, ensure that the treats have enough time to cool and set after the chocolate drizzle is applied. These precautions help you achieve a crisp yet chewy texture without any unwanted stickiness.
Can These Treats Be Stored for Later Use, and How Should I Reheat Them?
Yes, these treats can be stored and enjoyed later without sacrificing much of their original texture. For short-term storage, place the treats in an airtight container in the refrigerator, where they’ll remain fresh for up to three days. If you need to keep them longer, consider freezing them in a freezer-safe container for up to one month. When you’re ready to enjoy them again, allow the treats to come to room temperature or gently warm them in a low-temperature oven for a few minutes. This gentle reheating helps to restore the treats’ ideal texture and flavor without melting the chocolate drizzle too much.
Related Recipes
If you love the playful spirit of Halloween Mummy Treats, you might also enjoy exploring a variety of other festive recipes that add a whimsical twist to classic desserts. Consider trying out our spooky Ghost Cupcakes, which combine light vanilla cake with hauntingly delicious marshmallow frosting, or our Wicked Witch Finger Cookies that bring fun and fright together in every bite. For those looking for something unique, our Pumpkin Spice Rice Krispies Treats merge autumn flavors with the satisfying crunch of cereal, while our Creepy Crawly Chocolate Brownies offer an extra dash of eerie creativity with edible insects for decoration. Each of these recipes offers a creative spin on traditional treats, ensuring your celebrations are both memorable and delicious.
Conclusion: A Delicious Intersection of Tradition and Modernity
As we wrap up our journey through the delightful world of Halloween Mummy Treats, it’s clear that this recipe stands at the crossroads of time-honored tradition and modern culinary creativity. The combination of crunchy Rice Krispies melted marshmallows, and a playful drizzle of white chocolate has evolved from humble beginnings into a festive masterpiece that excites both the young and the young at heart. Each treat is a nod to the nostalgia of past Halloween celebrations, infused with innovative twists that cater to today’s busy lifestyles and diverse dietary needs. The ease of preparation makes it accessible for home cooks, while the artistic presentation invites endless customization and fun. This blend of tradition and modernity makes every bite not just a treat for the taste buds but a celebration of creativity and culture.
Call to Action
Ready to make this delicious Halloween Mummy Treats recipe? Give it a try and let us know how it turns out! We’d love to hear about your twists, tips, and serving ideas in the comments below. Share your stories and photos, and join our community of home chefs who celebrate every festive occasion with a sprinkle of creativity. Whether you stick to the classic version or experiment with your unique variations, your experience is valuable to us. Engage with fellow food enthusiasts by discussing how you overcame challenges or added your flair to this fun recipe. Let your culinary journey be a shared adventure that inspires others to bring more creativity to their kitchens.