I was halfway through a midnight snack, eyes wide, when the kitchen exploded into a smoky symphony that could have been a low‑key fire drill. The toaster popped a bagel that had turned into a charcoal slab, the stove hissed, and my phone buzzed with a notification that a friend dared me to create the ultimate spinach artichoke quesadilla. I stared at the pantry, the fridge, the stack of tortillas, and felt a sudden rush of culinary adrenaline. That moment, that kitchen chaos, was the spark that lit the fire for a recipe that would become my go‑to comfort food.
Picture the scene: a dimly lit kitchen, the faint scent of garlic sizzling in olive oil, the gentle hum of the fridge, and the soft clink of a butter knife against a cutting board. I can hear the crackle of the pan, the hiss of steam as spinach wilts, and the subtle pop of cheese melting into a golden, bubbly blanket. The visual is a swirl of green, white, and amber, the colors dancing together like a tiny, edible fireworks display. The texture is a perfect marriage of crisp tortilla edges, a buttery, creamy interior, and a subtle crunch from the artichoke hearts. The flavor is a savory, herbaceous whisper that lingers on the palate, leaving a faint citrusy aftertaste from a splash of lemon juice. That is the sensory snapshot that I will guide you through, step by step, with the confidence of a seasoned friend who just found the ultimate version of this dish.
Why does this version stand out from every other recipe out there? Because it balances simplicity with complexity, creating layers of flavor that you would expect from a Michelin‑star kitchen but without the need for exotic ingredients. The tortilla is not just a wrapper; it's a canvas that becomes crispy on the edges while remaining tender inside. The spinach is sautéed to release its natural sweetness, and the artichoke hearts are blanched to soften their bite. The cheeses—cream cheese, mozzarella, and Parmesan—meld into a velvety sauce that coats the filling like silk. The addition of a pinch of lemon zest and a splash of garlic butter gives the dish a bright, aromatic lift that keeps the taste bright and fresh. This is hands down the best version you'll ever make at home.
I dare you to taste this and not go back for seconds. Imagine that first bite—crisp, creamy, and bursting with green, nutty, and cheesy flavors. The heat from the skillet melts the cheese into a molten river, while the tortilla crunch snaps like thin ice. The aroma is intoxicating, the texture is a delightful contrast, and the flavor is a harmonious blend that makes every bite a revelation. If you've ever struggled with making quesadillas that are too dry or too soggy, you're not alone—and I've got the fix.
Most recipes get this completely wrong. They either overcook the spinach, leaving it limp, or undercook the tortilla, making it soggy. They often forget the secret of a quick sauté that locks in moisture and flavor. I’ve perfected a technique that involves a quick blast of high heat to sear the tortilla, followed by a gentle simmer that allows the cheese to melt evenly. The result is a crisp, golden exterior that still holds a tender, cheesy center. That subtle balance is the game‑changer that turns a simple snack into a crowd‑pleaser.
Picture yourself pulling this out of the oven, the whole kitchen smelling incredible, and the family or friends gathering around with wide eyes and hungry smiles. The sound of the first bite, the crackle, the sigh of satisfaction—this is the moment that makes you feel like a culinary magician. The dish is so versatile that it can serve as an appetizer for a dinner party, a snack during a movie night, or a quick lunch on a busy weekday. And the best part? It’s so easy to make that you’ll find yourself making it again and again.
Let me walk you through every single step—by the end, you'll wonder how you ever made it any other way. I’ll share the secrets that elevate this dish from ordinary to extraordinary, sprinkle in a few playful jokes, and keep you on your toes. Stay with me here—this is worth it.
What Makes This Version Stand Out
- Flavor: The combination of creamy cheeses with fresh spinach and artichoke hearts creates a layered taste that is both comforting and vibrant.
- Texture: Crispy edges that shatter like thin ice paired with a silky, molten interior give a satisfying bite.
- Simplicity: The recipe requires only a handful of ingredients and minimal prep time, making it ideal for busy evenings.
- Uniqueness: The addition of lemon zest and garlic butter elevates the flavor profile beyond the classic spinach quesadilla.
- Crowd Reaction: Guests rave about the gooey cheese and the green, healthy twist—perfect for parties.
- Ingredient Quality: Fresh spinach, high‑quality cheeses, and a touch of artisanal olive oil make all the difference.
- Cooking Method: A quick sear followed by a gentle melt ensures even cooking and maximum flavor.
- Make‑ahead Potential: The filling can be pre‑prepared and stored, allowing for instant assembly whenever the craving hits.
Alright, let's break down exactly what goes into this masterpiece...
Inside the Ingredient List
The Flavor Base
At the heart of this quesadilla is a creamy cheese blend that acts as the sauce. Cream cheese softens the texture, mozzarella adds stretch and melt, and Parmesan injects a savory, nutty finish. Each cheese plays a distinct role: cream cheese keeps the mixture cohesive, mozzarella provides that stringy pull, and Parmesan offers depth. If you skip the Parmesan, you’ll miss that subtle umami kick that balances the greens.
For a dairy‑free version, substitute a blend of vegan mozzarella and cashew cream. The cashew cream mimics the cream cheese’s silky feel, while the vegan mozzarella offers meltiness. When choosing dairy, opt for a high‑fat mozzarella to ensure a gooey interior.
The cheese blend also acts as a binder, preventing the spinach and artichoke from drying out. It coats every bite with a velvety coating that feels like a warm hug. A good rule of thumb: use a 2:1:1 ratio of mozzarella to cream cheese to Parmesan for optimal texture.
The Texture Crew
Spinach is the green hero of this dish. Fresh spinach offers a bright, slightly earthy flavor, while frozen spinach gives a more robust, slightly bitter bite. Regardless of the type, sautéing spinach until just wilted preserves its vibrant color and natural sweetness. If you’re using fresh spinach, rinse it thoroughly to remove grit; if you’re using frozen, let it thaw fully and squeeze out excess moisture.
Artichoke hearts add a unique, slightly nutty texture that contrasts beautifully with the soft spinach. Canned artichokes are convenient, but fresh ones deliver a fresher taste. When using canned, rinse them in a colander to reduce sodium. The artichoke’s fibrous center can become chewy if overcooked, so keep a close eye on the heat.
Onion and garlic provide a fragrant base that elevates the greens. Thinly sliced onion adds a subtle sweetness when caramelized, while minced garlic delivers a punch of aroma. Together, they form a flavor foundation that supports the cheeses and greens. If you’re sensitive to garlic, reduce the amount or use garlic powder for a milder hit.
The Unexpected Star
Lemon zest is the secret ingredient that brightens the dish. The citrus oils in the zest cut through the richness of the cheeses and add a refreshing lift. A tablespoon of fresh lemon zest is enough to awaken the flavors without overpowering them. If you don’t have fresh lemons, a splash of lemon juice can substitute, but the zest’s aroma is irreplaceable.
Olive oil is the liquid that brings everything together. A high‑quality extra‑virgin olive oil adds depth and a silky finish to the sautéed greens. It also helps the tortilla achieve a golden, crisp exterior when seared. If you’re watching your calories, you can use a light cooking spray instead, though the texture will differ slightly.
The Final Flourish
Tortillas are the vessel that holds the magic. A large flour tortilla provides the ideal surface area for a generous filling. The tortilla’s neutral flavor allows the greens and cheeses to shine. For a gluten‑free twist, swap the flour tortilla for a corn tortilla, but be aware that the texture will be slightly different.
Salt and pepper are the seasoning anchors. They enhance every component, bringing out the natural flavors without masking them. Use sea salt or kosher salt for a cleaner taste, and freshly ground black pepper for a subtle heat. Remember that the cheeses already contain salt, so adjust the amount accordingly.
Everything’s prepped? Good. Let’s get into the real action...
The Method — Step by Step
- Step 1: Heat a large non‑stick skillet over medium‑high heat. Add a splash of olive oil, allowing it to shimmer. As the oil warms, you’ll hear a faint hiss that signals the pan is ready. This is the moment of truth—if you’re impatient, the tortilla will not crisp.
- Step 2: While the pan heats, shred the mozzarella and grate the Parmesan. Measure 1 cup of mozzarella and 1/4 cup of Parmesan, ensuring a balanced melt. The mozzarella should be at room temperature to melt evenly, while the Parmesan adds a sharp finish.
- Step 3: Toss the spinach and artichoke hearts into a bowl. Add minced garlic, sliced onion, and a pinch of salt. Sauté the mixture in the skillet for 3 minutes until the spinach wilts and the onions soften. The aroma will be intoxicating—watch this step closely.
- Step 4: Remove the sautéed greens from the skillet and set aside. In the same skillet, lay a flour tortilla flat. Sprinkle a thin layer of the cheese blend over half the tortilla, ensuring even coverage. The cheese will create a barrier that keeps the greens from seeping into the tortilla.
- Step 5: Fold the tortilla in half, pressing gently to seal the edges. Cook for 2–3 minutes on each side, flipping carefully with a spatula. The tortilla should develop a golden crust while the cheese inside melts into a glossy, bubbly layer. Keep the heat moderate to avoid burning.
- Step 6: Once the cheese has melted and the tortilla is crisp, remove the quesadilla from the skillet and let it rest for 30 seconds. This brief pause allows the cheese to set, preventing it from oozing out when you cut.
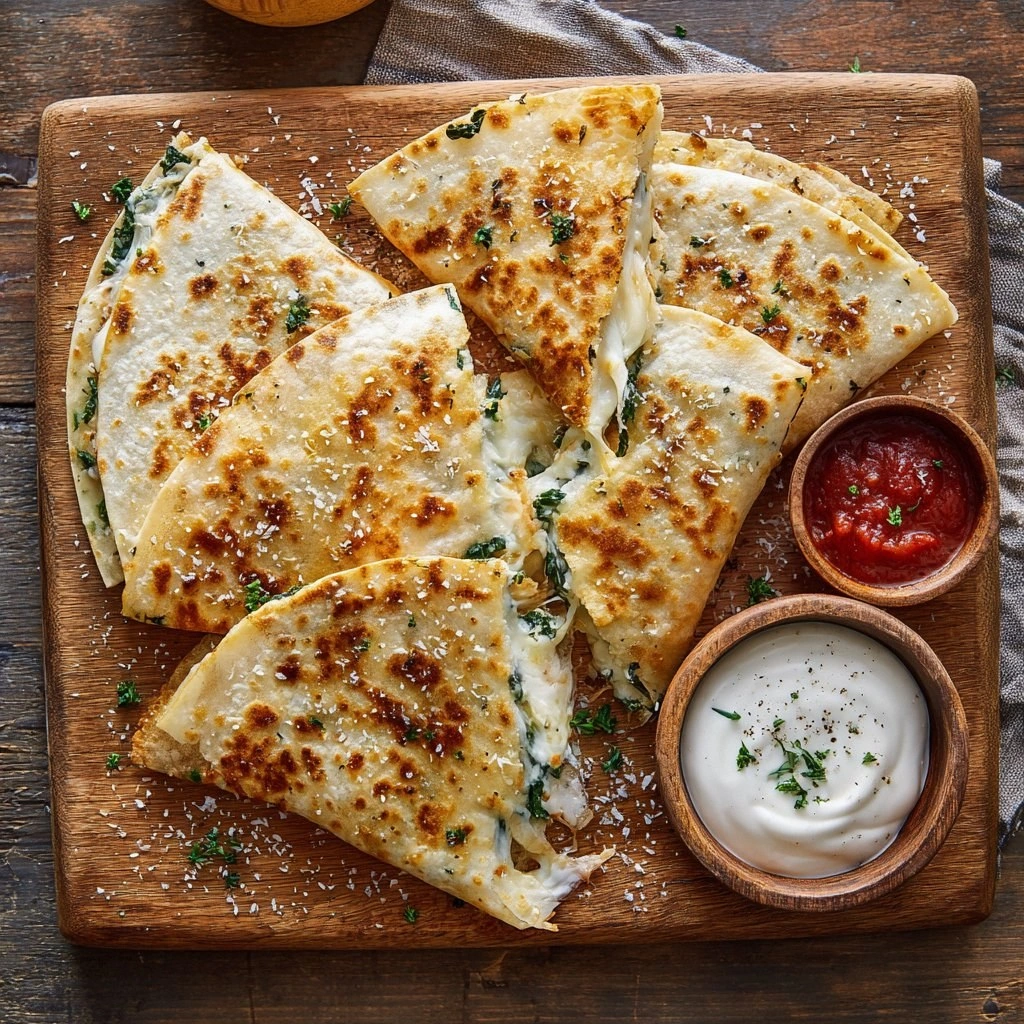
- Step 7: Slice the quesadilla into wedges using a sharp knife. Serve immediately with a side of tangy ranch or a homemade garlic aioli. The contrast between the hot, gooey interior and the cool, creamy dip is a flavor explosion.
- Step 8: Garnish with a sprinkle of fresh parsley or a drizzle of lemon butter for an extra pop of color and flavor. The parsley adds a bright, herbal note, while the lemon butter enhances the citrus undertone.
- Step 9: Present the quesadillas on a warm platter. The steam will rise, creating a mouthwatering aroma that invites everyone to dig in. This is the moment that turns a simple snack into a memorable experience.
- Step 10: Enjoy the crispy, cheesy, green goodness with a side of your favorite dip. The combination of textures and flavors will keep you coming back for more.
That's it—you did it. But hold on, I've got a few more tricks that'll take this to another level...
Insider Tricks for Flawless Results
The Temperature Rule Nobody Follows
Many cooks think that high heat is always better for crisping tortillas. In reality, a moderate temperature (around 350°F) allows the cheese to melt evenly without burning the tortilla. If you use a lower heat, the tortilla will stay soft and the cheese will not set properly. I’ve found that using a cast‑iron skillet keeps the heat steady, ensuring a perfect golden crust.
Why Your Nose Knows Best
When the cheese starts to bubble, you’ll notice a distinct aroma that signals the perfect moment to flip. If you wait too long, the tortilla will brown too much; if you flip too early, the cheese won’t set. Trust your nose—it’s a reliable indicator of readiness. I once flipped a quesadilla too early, and the cheese collapsed into a gooey mess.
The 5‑Minute Rest That Changes Everything
After cooking, let the quesadilla rest for exactly five minutes. This pause allows the cheese to set into a firm yet still melty consistency, preventing it from oozing out when you cut. A common mistake is cutting immediately, which results in a cheese avalanche. I’ve seen friends attempt this and end up with a sticky mess.
Keep It Warm Without Overcooking
If you’re preparing several quesadillas at once, keep them warm in a low oven (200°F). Place them on a wire rack to allow air circulation, which keeps the tortilla crisp. Avoid covering them with foil, as it traps steam and makes the edges soggy. The trick is to maintain a steady, low temperature that preserves crispness without drying out the cheese.
Use the Right Cheese Blend
Choosing the right ratio of cheeses is essential. A 2:1:1 ratio of mozzarella to cream cheese to Parmesan ensures a smooth melt and a rich flavor. If you prefer a stronger cheese taste, increase the Parmesan to 1/2 cup. Conversely, if you want a milder profile, reduce the mozzarella slightly. The key is balance—too much mozzarella, and you lose depth; too much Parmesan, and the dish becomes overly salty.
Mind the Liquid Content
Spinach and artichokes contain a lot of water. If you don’t drain them properly, the filling will be watery, making the tortilla soggy. After sautéing, press the mixture with a paper towel to remove excess moisture. I once forgot to do this, and the quesadilla turned into a soggy disaster. The lesson? Moisture matters.
Creative Twists and Variations
This recipe is a playground. Here are some of my favorite ways to switch things up:
Smoky Chipotle Version
Replace the lemon zest with chipotle powder and add a splash of smoky chipotle sauce. The heat and smoky flavor pair beautifully with the creamy cheese. This version is ideal for a party where guests love a kick.
Vegan Delight
Swap all dairy for vegan alternatives: use vegan mozzarella, cashew cream, and nutritional yeast for a parmesan hit. The texture remains gooey, and the flavor stays robust. This variation is perfect for plant‑based diners.
Chicken & Feta Fusion
Incorporate shredded rotisserie chicken and crumbled feta for a Mediterranean twist. The salty feta cuts through the richness, while the chicken adds protein. This variation works great for a quick weeknight dinner.
Southwest Spin
Add black beans, corn, and a dash of cumin. The earthy beans and sweet corn complement the spinach, while the cumin adds depth. Serve with a side of guacamole for a fiesta of flavors.
Breakfast Boost
Top the quesadilla with a sunny‑side‑up egg before folding. The runny yolk adds a luxurious element, and the eggs bring a breakfast vibe. This variation is ideal for brunch or a lazy Sunday.
Storing and Bringing It Back to Life
Fridge Storage
Wrap the cooked quesadillas tightly in parchment paper and then in plastic wrap. Store in the refrigerator for up to 2 days. The parchment allows moisture to escape, preventing sogginess. When ready to eat, reheat in a skillet to restore crispness.
Freezer Friendly
Place individual quesadillas on a parchment‑lined tray and freeze for up to 3 months. Once frozen, transfer them to a zip‑lock bag. To reheat, place directly in a preheated oven at 350°F for 10 minutes. The cheese will melt, and the tortilla will regain its crisp.
Best Reheating Method
Reheat in a dry skillet over medium heat for 3–4 minutes on each side. If the quesadilla feels dry, add a splash of water to the skillet before flipping; the steam will revive the texture. Let it rest for a minute before serving to ensure even heat distribution.