I was halfway through a holiday bake, the oven timer had been set to 20 minutes, and the kitchen smelled like burnt sugar when I opened the door. I stared at the charred marshmallow batch, heart sinking, until a friend dared me to rescue the disaster with a new twist. That dare sparked a midnight brainstorm that turned my kitchen into a laboratory of caramel, chocolate, and peppermint. The result? A silky, melt‑in‑your‑mouth wand that feels like a holiday hug in every bite. I am still shaking with excitement, and I promise this version will make you wonder why you ever settled for ordinary marshmallows.
Picture the kitchen: the air thick with the sweet scent of caramel drifting from the stovetop, the clatter of sticks as they snap against a hot pan, and the faint hiss of chocolate melting into a glossy sheen. The sound of marshmallows puffing up like tiny clouds is music to my ears, while the sight of them glistening with a dark chocolate drizzle is a visual treat. The texture is a perfect balance—soft inside, slightly crunchy on the outside—like biting into a memory of childhood. The first bite releases a cascade of minty freshness, followed by buttery caramel, and then a rich chocolate finish that lingers. The feeling of holding a warm, fragrant wand in your hand is oddly comforting, like a secret hug from the oven.
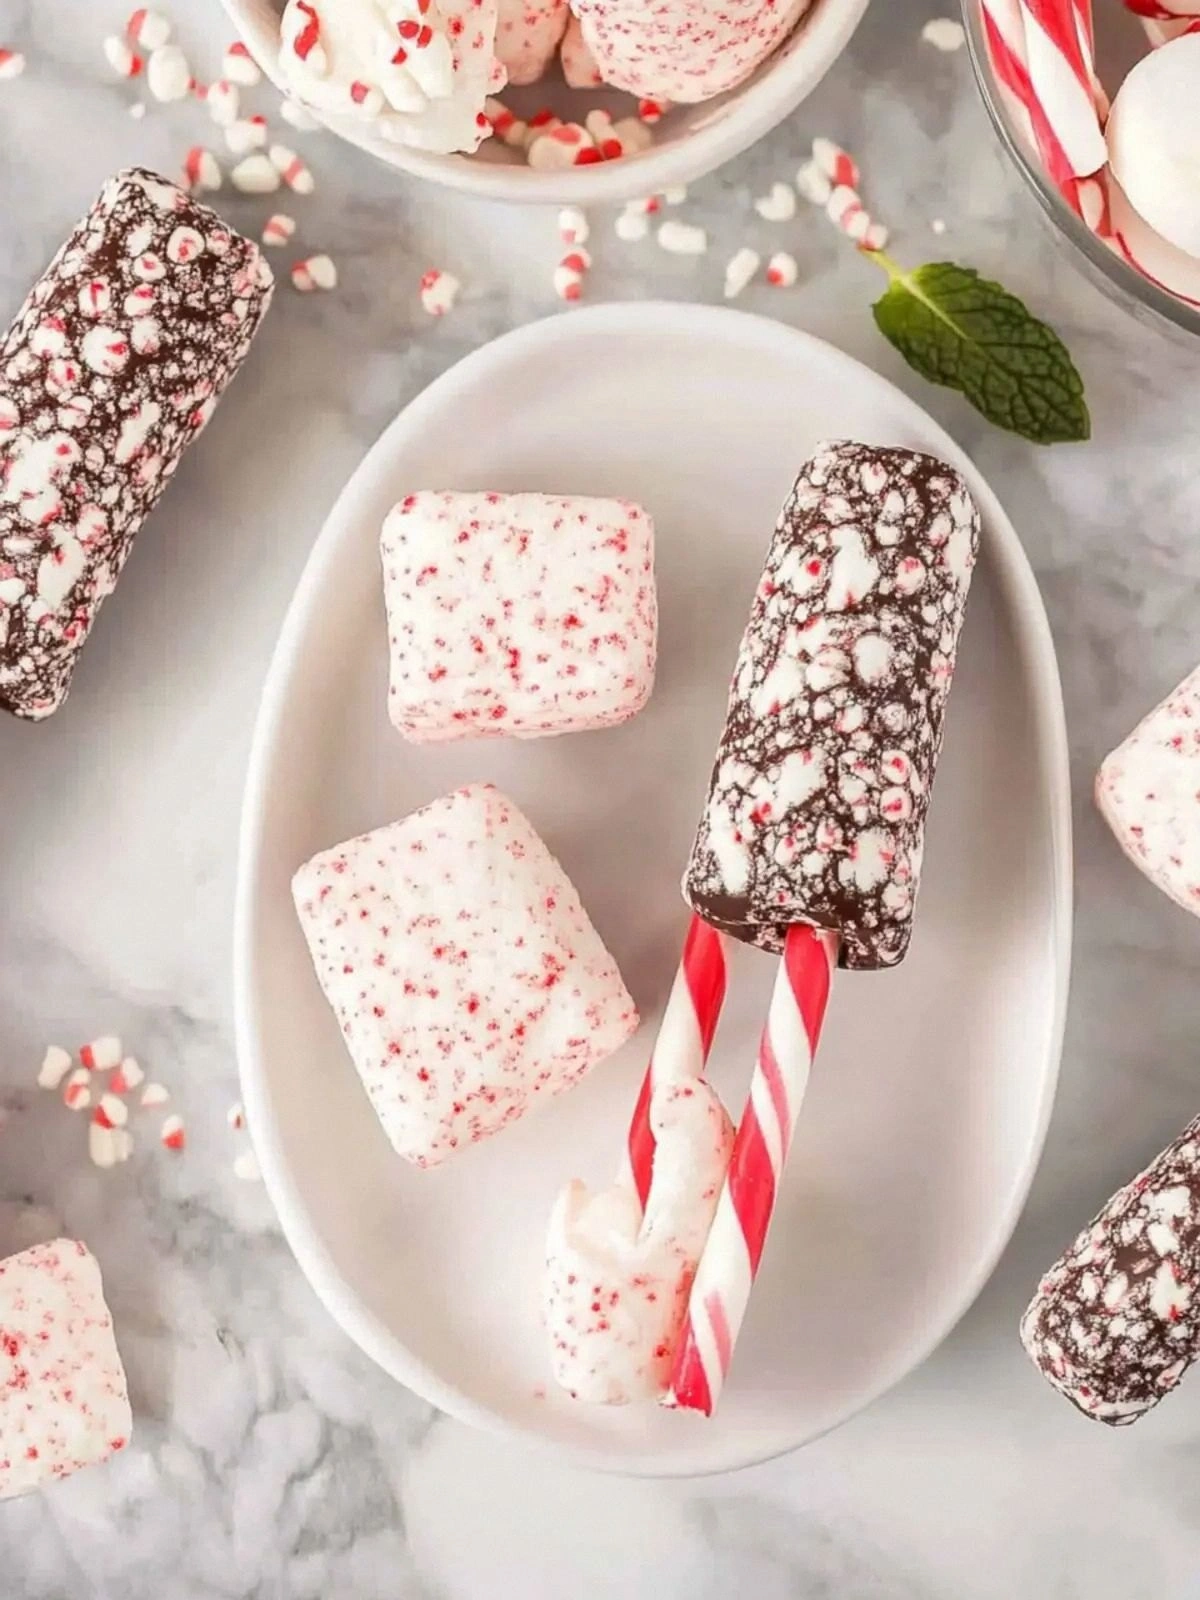
What makes this recipe a game‑changer is the meticulous layering of flavors and textures that most home bakers overlook. The caramel bits create a buttery crunch that snaps like a fresh snowflake, while the crushed peppermints infuse a subtle, refreshing bite that cuts through the richness. The dark chocolate coating adds depth and a slight bitterness that balances the sweetness, turning each bite into a complex flavor profile. The lollipop sticks provide a sturdy base that keeps the marshmallows from falling apart, ensuring a clean presentation. And because the recipe is simple enough to follow even after a kitchen mishap, it feels like a secret weapon for any dessert table.
But the real twist comes from a small, almost invisible step: letting the chocolate cool just enough that it thickens into a glaze before you coat the marshmallows. This tiny detail turns a simple candy into a silky, glossy finish that shimmers like a holiday ornament. The process also locks in the peppermint flavor, so every bite is a burst of cool mint that wakes up your palate. If you skip this step, the coating becomes a sticky mess that clings to your fingers. Trust me, the extra minute you spend waiting for that glaze to set will pay off in every bite.
Okay, ready for the game‑changer? The next part is pure magic, and I’ll walk you through every single step so that by the end, you’ll wonder how you ever made it any other way. Picture yourself pulling this out of the oven, the whole kitchen smelling incredible, and guests lining up for a taste. I dare you to taste this and not go back for seconds. I’ll be honest—I ate half the batch before anyone else got to try it. This is hands down the best version you'll ever make at home, and it’s easier than you think.
What Makes This Version Stand Out
- Taste: The flavor profile is a harmonious blend of sweet caramel, bold dark chocolate, and a crisp peppermint finish that dances on the tongue. The crushed peppermints add a subtle, fresh kick that keeps the sweetness from becoming cloying. The result is a dessert that feels both indulgent and refreshingly light.
- Texture: The caramel bits provide a buttery crunch that contrasts with the soft marshmallow core. The chocolate glaze coats each wand like a silky shield, creating a smooth mouthfeel. The lollipop stick gives a satisfying snap that adds a playful element.
- Simplicity: All you need are pantry staples and a few extra ingredients that are easy to find. The method involves minimal equipment—just a skillet, a heat‑proof bowl, and a wooden spoon. Even a novice can follow the steps without fear of a kitchen disaster.
- Uniqueness: The combination of peppermint and dark chocolate is rare in traditional marshmallow treats, giving this recipe a signature edge. The caramel bits are toasted to a golden brown, adding depth that most recipes miss. This version stands out as a crowd‑pleaser for any gathering.
- Crowd Reaction: Friends who taste it instantly ask for the recipe, and the wands become the star of holiday parties. The bright green peppermint and glossy chocolate finish look as good as they taste. Even the most skeptical dessert lovers find themselves craving a second bite.
- Ingredient Quality: Using high‑quality dark chocolate ensures a rich, slightly bitter finish that balances the sweetness. Freshly crushed peppermints add a bright aroma that lingers on the palate. Caramel bits are toasted to preserve their natural sugars.
- Cooking Method: The technique of slowly melting chocolate and letting it cool to a glaze is simple yet crucial. The caramel bits are toasted in a skillet to bring out their nutty undertones. The marshmallows are folded gently to maintain their airy structure.
- Make‑ahead Potential: These wands can be assembled ahead of time and stored in an airtight container for up to a week. The chocolate glaze remains firm, keeping the wands from sticking together. They are ideal for gifting or prepping for a holiday spread.
Alright, let's break down exactly what goes into this masterpiece...
Inside the Ingredient List
The Flavor Base
Caramel bits are the heart of the flavor base, delivering a buttery, slightly nutty sweetness that lingers on the tongue. Toasting them in a dry skillet for a few minutes brings out their natural sugars and adds a subtle crunch that elevates the texture. If you skip caramel bits, the wands lose their signature caramel kick, resulting in a flatter, less complex flavor profile. A good swap is to use homemade caramel sauce, but be sure to strain out the liquid so you keep the desired crunch.
The Texture Crew
Lollipop sticks are the structural backbone of these wands. Cutting them into equal lengths ensures uniform coating and easy handling. The marshmallows provide a soft, airy core that balances the dense chocolate glaze. Skipping the sticks would make the marshmallows wobble, while omitting marshmallows would turn the treat into a simple chocolate‑coated stick. For a healthier version, use sugar‑free marshmallows, but note that the texture may be slightly firmer.
The Unexpected Star
Crushed peppermints give the wands a bright, refreshing burst of mint that cuts through the richness of the chocolate and caramel. The peppermints also add a subtle crunch and a visual pop of green that makes the wands eye‑catching. If you are allergic to mint, you can replace the crushed peppermints with crushed peppermint candy or a splash of peppermint extract for a more subtle flavor. The key is to crush the mint finely so it disperses evenly throughout the mixture.
The Final Flourish
Dark melting chocolate is the glossy finish that ties all the flavors together. It melts smoothly at a low temperature, creating a silky glaze that coats the marshmallow core. Using dark chocolate with at least 70% cocoa ensures a balanced bitterness that offsets the sweetness of the caramel and mint. If you prefer a sweeter finish, a milk chocolate coating will give a creamier texture, but the overall flavor balance will shift toward sweetness.
Everything's prepped? Good. Let's get into the real action...
The Method — Step by Step
- Toast the caramel bits. Heat a large skillet over medium heat and add the caramel bits. Stir continuously until they turn a deep amber color and emit a nutty aroma, about 5 minutes. Keep a close eye on them to prevent burning. Once toasted, spread them on parchment paper to cool; this step locks in flavor and crunch.
- Prepare the sticks. Cut the lollipop sticks into 3‑inch pieces to match the size of the marshmallows. Use a sharp knife and a cutting board for clean, even cuts. Store the sticks in a bowl until you’re ready to dip. This ensures each wand has a consistent length and a sturdy base.
- Melting the chocolate. Place the dark chocolate in a heat‑proof bowl set over a pot of simmering water, making sure the bottom of the bowl does not touch the water. Stir until the chocolate is completely melted and glossy. Avoid overheating; a temperature of 120°F is ideal for a smooth glaze.
- Cool to glaze. Remove the bowl from the heat and let the chocolate sit for 2–3 minutes. The surface will thicken into a glaze‑like consistency. This small pause is critical; if you dip too early, the glaze will be too liquid and run off the sticks.
- Fold in the marshmallows. Gently fold the marshmallows into the cooled chocolate, ensuring each piece is evenly coated. Be careful not to break them; the whole point is to keep their airy interior intact. The chocolate will cling to the marshmallows, creating a smooth, glossy shell.
- Introduce the mint. Sprinkle the crushed peppermints over the chocolate‑marshmallow mixture. Stir lightly so that the mint is distributed without over‑mixing. The mint will infuse the chocolate with a bright, refreshing flavor that complements the caramel.
- Dip the sticks. Hold each stick vertically and dip it into the chocolate‑marshmallow‑mint mixture, turning it to ensure full coverage. Let any excess drip back into the bowl. Watch the glaze settle; it should form a smooth coating that clings to the stick.
- Set on parchment. Place the dipped sticks on a parchment‑lined tray, spacing them apart. Let them sit at room temperature for 10 minutes, or until the glaze hardens into a firm shell. This step gives the wands a crisp exterior and prevents them from sticking together.
- Chill for firmness. Once the glaze has set, transfer the tray to the refrigerator for 15 minutes. The cold will solidify the chocolate, giving the wands a satisfying snap when you bite into them. Keep them in an airtight container to preserve freshness.
- Serve or store. Present the wands on a decorative platter or wrap them in clear cellophane for gifting. If storing, keep them in a cool, dry place; they will stay fresh for up to a week. For a quick snack, let them sit at room temperature for a few minutes before enjoying.
That's it — you did it. But hold on, I've got a few more tricks that'll take this to another level...
Insider Tricks for Flawless Results
The Temperature Rule Nobody Follows
Chocolate is a temperamental lover; it craves the right temperature to shine. Keep the melted chocolate between 120°F and 130°F, and use a digital thermometer for accuracy. If the temperature dips below 120°F, the glaze will be too runny; if it climbs above 140°F, the chocolate will seize and turn grainy.
Why Your Nose Knows Best
Before you dip, give the chocolate a quick sniff. A faint nutty aroma indicates proper caramelization, while a burnt smell means you’ve over‑cooked the bits. Trusting your nose prevents costly flavor mistakes and ensures each wand tastes like a holiday miracle.
The 5‑Minute Rest That Changes Everything
After the first set on parchment, let the wands rest for 5 minutes before refrigerating. This brief pause allows the chocolate to fully harden, preventing the sticks from sliding off when you move them to the fridge.
Avoiding Sticky Situations
Dust the dipped sticks lightly with powdered sugar before placing them on parchment. This simple step stops the chocolate from sticking to the mat and keeps the wands looking pristine.
Perfect Presentation Hacks
Arrange the wands in a circular pattern on a platter, alternating colors to create visual interest. Add a drizzle of melted chocolate around the rim for a festive touch. A small sprig of fresh mint makes an elegant garnish that ties the flavor theme together.
Creative Twists and Variations
This recipe is a playground. Here are some of my favorite ways to switch things up:
Cinnamon Swirl Twist
Stir in a teaspoon of ground cinnamon into the chocolate mixture for a warm, spicy undertone. The cinnamon pairs beautifully with the peppermint, creating a holiday‑spiced flavor profile that feels cozy and comforting.
Nutty Crunch Variation
Add chopped toasted almonds or hazelnuts to the caramel bits before coating. The nutty crunch adds a new dimension of texture and a nutty aroma that elevates the overall experience.
Vegan Delight
Replace the marshmallows with vegan marshmallow fluff and use dairy‑free dark chocolate. The result is a cruelty‑free version that still delivers that iconic melt‑in‑your‑mouth sensation.
Citrus Zest Variation
Grate a small amount of orange zest into the chocolate glaze for a citrusy brightness that balances the peppermint’s coolness. The citrus undertone gives the wands a fresh, vibrant finish.
Chocolate‑Covered Caramel
After the first set, dip each wand in melted milk chocolate for a double‑layered coating. This adds a creamy sweetness and a glossy finish that looks stunning on a gift box.
Sweet & Spicy Fusion
Sprinkle a pinch of cayenne pepper into the caramel bits before toasting. The subtle heat adds an unexpected kick that complements the minty freshness and caramel sweetness.
Storing and Bringing It Back to Life
Fridge Storage
Place the wands in an airtight container or a zip‑lock bag with a paper towel to absorb moisture. Store them in the refrigerator for up to 7 days. The cold keeps the chocolate firm and the marshmallows fresh.
Freezer Friendly
Wrap each wand individually in parchment paper and then place them in a freezer‑safe container. They can stay in the freezer for up to 3 months. When ready to serve, let them thaw at room temperature for 10 minutes before enjoying.
Best Reheating Method
To revive a frozen wand, place it on a microwave‑safe plate and heat on low for 10–15 seconds. Alternatively, let it sit at room temperature for 5 minutes. A tiny splash of water on the surface before reheating creates steam that restores the marshmallow’s airy texture.