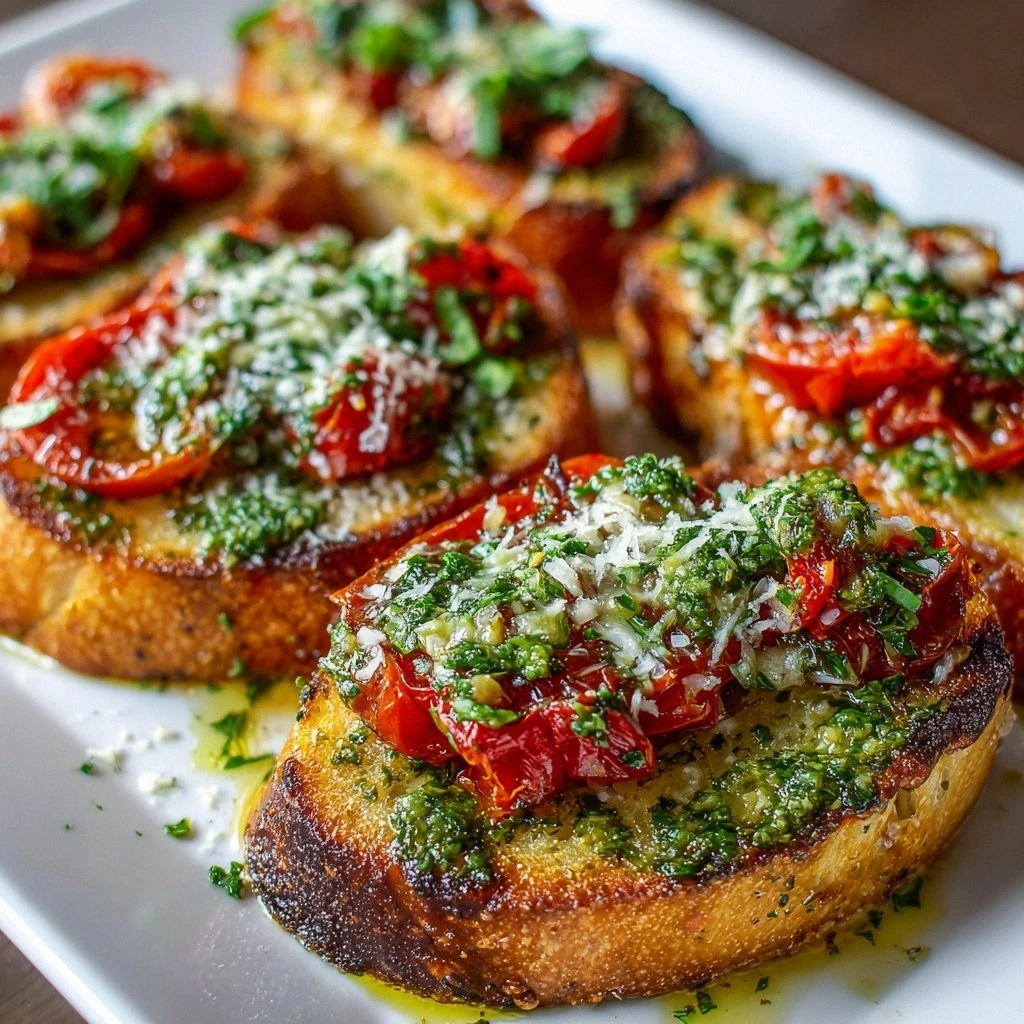
Picture this: I’m halfway through a midnight snack, the kitchen lights flicker, and the pantry door slams open like a dramatic curtain. Inside, a forgotten box of Crispix cereal sits beside a jar of brown sugar and a half-moon of unsalted butter. I’m staring at the sugar, wondering if it’s the sweet, sticky glue that could turn my cereal into a dessert or just another mess. A friend had dared me to make something “unbelievably sweet” with a cereal I’d never used before, and I couldn’t refuse. The challenge felt like a culinary dare, a test of my ability to turn the ordinary into the extraordinary. I reached for the butter, the sugar, and the corn syrup, and the scent of caramel started to whisper promises of decadence. The moment the butter melted, the kitchen smelled like a summer afternoon in a candy shop. That scent alone made me think of sticky, golden rivers that would coat the cereal like velvet. I knew I was about to create something that would make the room taste like a sweet carnival.
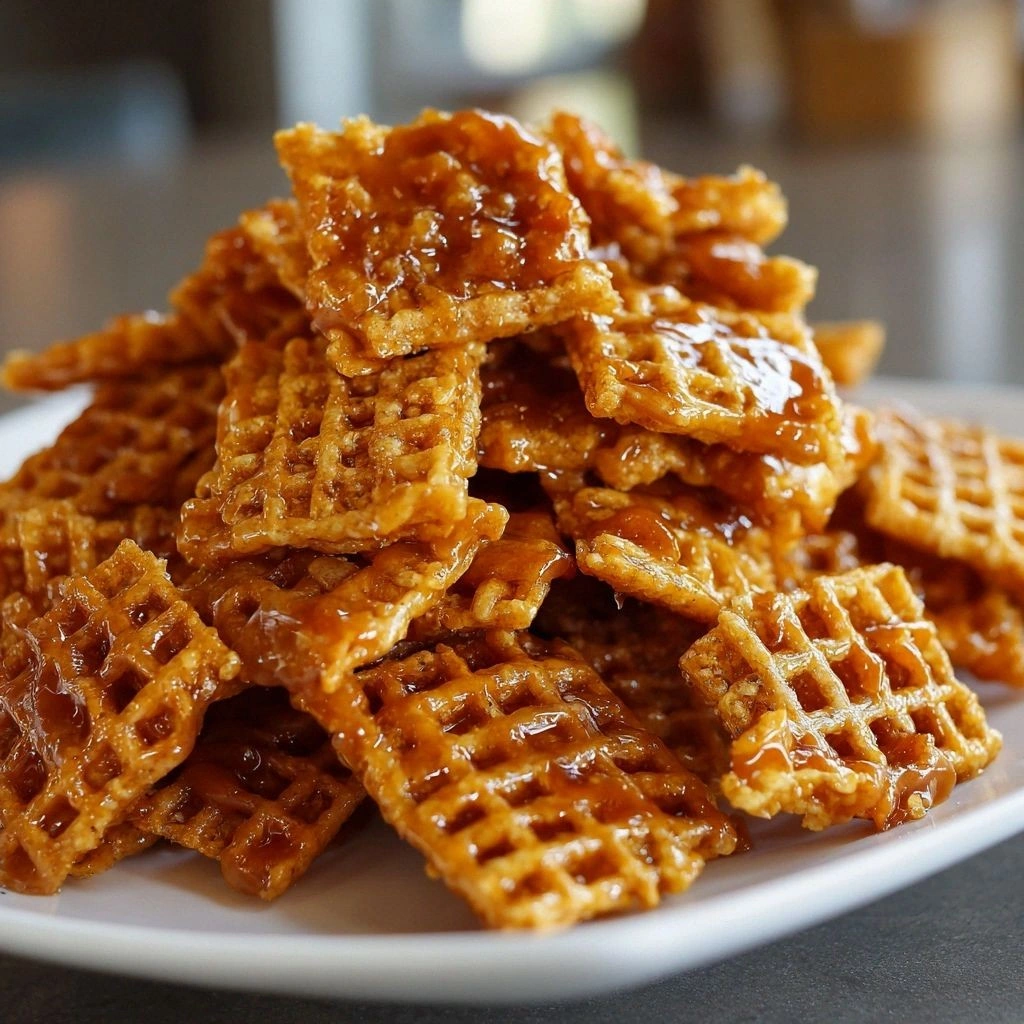
The first bite was a revelation. Crispix’s familiar crunch was amplified by a caramel glaze that clung to each bite like a glossy coat. The caramel was not just sweet; it carried a subtle depth from the brown sugar, a hint of vanilla, and a buttery finish that made it feel indulgent yet balanced. The texture was a dance of crisp and chewy, with the caramel forming a thin shell that snapped with every bite. The aroma was warm and comforting, reminiscent of a childhood kitchen where the stove was always on. The sound of the first crunch echoed like a tiny explosion of flavor, and the taste lingered long after the cereal was gone. I could taste the caramel’s sweetness, the slight bitterness of the sugar, and the faint nuttiness of the butter. The flavor profile was layered, not one-dimensional, which is why I couldn’t stop myself from taking another bite. The moment my mouth tasted the caramel, I felt a rush of satisfaction that only a truly good dessert can bring. I knew this would become my go-to recipe for parties, movie nights, or whenever I needed a quick sweet fix.
What sets this version apart from every other caramelized cereal recipe is the precise balance of ingredients and the technique that turns a simple bowl into a work of art. The caramel’s thickness is achieved by carefully controlling the heat, preventing crystallization, and adding a pinch of baking soda that gives it a light, airy lift. The Crispix cereal is chosen for its robust crunch, but you could swap it for cornflakes or rice krispies if you’re feeling adventurous. The use of corn syrup is not just for sweetness; it’s the secret to that silky mouthfeel that makes the caramel cling to the cereal without making it soggy. I’ve experimented with different types of sugar, but dark brown sugar gives the caramel a deeper, almost molasses-like flavor that pairs beautifully with vanilla. The butter is unsalted so that I can control the saltiness and keep the caramel from becoming too sweet. The result is a dessert that feels both indulgent and refined, a perfect balance that makes it unforgettable.
There’s a secret ingredient that most people overlook: baking soda. This little ingredient is a game-changer; it reacts with the caramel to create tiny bubbles that give the glaze a lightness that feels almost like a souffle. When the caramel begins to bubble, it’s a sign that the chemistry is happening just right. The trick is to add the soda at the right moment, right before the caramel reaches a golden amber. That moment is the turning point of the recipe, the point where the caramel transitions from thick to light. I dare you to taste this and not go back for seconds. The texture is a perfect marriage of crunchy cereal and silky caramel. The flavor profile is deep, rich, and utterly satisfying. By the end, you’ll wonder how you ever made it any other way.
What Makes This Version Stand Out
- Flavor Depth: The caramel isn’t just sweet; it has a subtle complexity from brown sugar and vanilla that makes each bite feel luxurious. The sweetness is balanced by the buttery undertone, preventing it from becoming cloying. The result is a dessert that feels indulgent yet refined.
- Texture Contrast: Crispix’s crunch is amplified by a caramel glaze that clings and then snaps, creating an audible pop with every bite. The caramel forms a thin shell that yields to the crunch, giving a satisfying snap that is almost theatrical. This contrast keeps the mouth moving and the flavor alive.
- Ingredient Simplicity: Only six ingredients are required, yet each one plays a critical role. No fancy gadgets, no obscure spices, just pantry staples turned into something extraordinary. This simplicity makes the recipe accessible to anyone.
- Make‑Ahead Potential: Once the caramel is set, the mixture can be stored in an airtight container for up to a week. The caramel stays crisp and the cereal retains its crunch, making it a perfect snack for busy days.
- Crowd Reaction: At parties, this dessert is a showstopper. Guests will marvel at the glossy coating and the crunch, then devour it in seconds. The recipe’s visual appeal is as important as its taste.
- Heat Control: The caramel is cooked to a precise temperature, avoiding scorching or crystallization. This meticulous heat control is what separates a good caramel from a great one.
- Versatility: Swap Crispix for any cereal, or add nuts and dried fruit for extra texture. The base recipe is a canvas that can be customized to suit any palate or occasion.
- Baking Soda Lift: The tiny bubbles created by baking soda give the caramel a lightness that feels almost like a souffle. This lift adds a surprising airy quality to an otherwise dense glaze.
- Visual Appeal: The caramel’s golden hue glistens under light, making the dish look like a work of culinary art. This visual allure invites the eater to indulge.
Inside the Ingredient List
The Flavor Base
Brown sugar is the cornerstone of this caramel. Its molasses-like depth gives the glaze a rich, almost chocolatey undertone that balances the sweetness. If you prefer a lighter caramel, switch to light brown sugar; the flavor will be milder but still delicious. Skipping this step would leave the caramel flat and overly sweet. The sugar’s granules dissolve slowly, allowing the caramel to develop a silky consistency.
The Texture Crew
Unsalted butter adds richness and a buttery finish that makes the caramel cling beautifully to the cereal. Use a full-fat butter to get the best mouthfeel; a lower-fat version will be thinner and less glossy. If you’re allergic to dairy, coconut oil can be a substitute, but it will change the flavor profile slightly. Butter also helps to emulsify the caramel, keeping it from separating.
The Unexpected Star
Corn syrup is the unsung hero that prevents crystallization. Without it, the sugar would form gritty crystals, ruining the silky texture. If you’re avoiding corn syrup, you can use honey or maple syrup, but the caramel may become stickier and less smooth. The syrup also adds a subtle sweetness that complements the brown sugar.
The Final Flourish
Baking soda is the secret lift. When it reacts with the caramel, it releases tiny bubbles that make the glaze airy. Adding it too early can cause the caramel to become too foamy; adding it too late might not give the lift you’re after. A teaspoon for four servings is the sweet spot; too much can make the caramel taste soapy. Vanilla extract rounds everything out with warmth and depth, making the caramel feel complete.
Everything's prepped? Good. Let's get into the real action…
The Method — Step by Step
- First, preheat your oven to 350°F (175°C) and line a large baking sheet with parchment paper. This step ensures that the caramelized cereal won’t stick to the pan, making cleanup a breeze. Spread 4 cups of Crispix evenly on the sheet, making sure the flakes are in a single layer. The even spread will allow the caramel to coat each piece uniformly. This step is crucial for the final crunch.
- In a medium saucepan, melt 1 cup of unsalted butter over medium heat. Once melted, add 2 cups of brown sugar, stirring until the mixture is smooth. Watch for the sugar to dissolve completely; if it’s lumpy, let it sit a moment. The mixture should look glossy and slightly translucent. Keep the heat moderate to avoid scorching.
- Add 1 cup of corn syrup to the butter-sugar blend, stirring until fully incorporated. The mixture should begin to thicken and take on a golden amber hue. This is the moment where the caramel starts to develop its signature color. It’s also the point where the sugar’s crystalline structure begins to break down. This step is critical for achieving a smooth glaze.
- Bring the mixture to a gentle boil, then reduce the heat to low and let it simmer for 5 minutes. Stir occasionally to prevent sticking. The caramel should bubble gently, but not aggressively. This simmering allows the flavors to meld and the caramel to thicken. The aroma will become more pronounced, signaling that you’re on the right track.
- Add 2 teaspoons of vanilla extract and stir until the vanilla is fully blended. The vanilla’s warmth will lift the caramel’s flavor profile. The mixture should feel silky to the touch. Avoid over-stirring, as this can introduce air pockets. This step enhances the depth of the caramel.
- Now, sprinkle 1 teaspoon of baking soda over the caramel and whisk vigorously. The mixture will foam and rise, creating tiny bubbles that give the glaze a lightness. This reaction is the heart of the recipe’s texture. Watch the caramel bubble like a miniature volcano. The foam will settle into a glossy coating.
- Pour the caramel over the pre‑lined Crispix, using a spatula to spread it evenly. The caramel should coat each piece, but you don’t want it too thick; a thin glaze keeps the cereal crisp. Let the mixture sit for a minute to allow the caramel to set slightly before baking. This will help the glaze adhere better. The aroma will intensify as it bakes.
- Place the baking sheet in the preheated oven and bake for 15 minutes, or until the caramel turns a deep amber and the cereal is golden. Keep a close eye; caramel can go from perfect to burnt quickly. The sound of the caramel bubbling will diminish, signaling that it’s ready. Once done, remove it from the oven and let it cool on the sheet for 5 minutes.
- After the initial cooling, transfer the caramelized Crispix to a large bowl and stir gently to break up any clumps. This ensures even distribution of caramel on each piece. Let the mixture rest for another 10 minutes, allowing the caramel to set firmly. The result will be a crunchy, caramel-coated cereal that’s ready to eat. This step locks in the texture.
- If you prefer a softer caramel, let the mixture cool completely, then refrigerate for 30 minutes before serving. The cold will soften the glaze slightly, making it easier to bite. Alternatively, you can add a pinch of sea salt on top for a sweet‑and‑salty finish. The salt will enhance the caramel’s sweetness. This final touch elevates the flavor profile.
That’s it — you did it. But hold on, I’ve got a few more tricks that will take this to another level. The next section will dive into insider secrets that even seasoned cooks overlook. Stay tuned, because the next few paragraphs are pure gold.
Insider Tricks for Flawless Results
The Temperature Rule Nobody Follows
Many people think any oven temperature will work, but a precise 350°F is essential for even caramelization. If the oven runs hotter, the caramel will scorch before the cereal has a chance to coat. A cooler oven can result in a soggy coating that clumps together. Use an oven thermometer to verify the temperature, especially if your oven is old or uncalibrated. This small step saves you from a sticky mess.
Why Your Nose Knows Best
Before you even taste the caramel, let it cool for a minute and sniff it. A rich, buttery scent means the caramel is on point. If it smells off or too sweet, it’s likely overcooked. The aroma is a quick diagnostic tool that lets you avoid a burnt batch. Trust your nose; it’s the best judge of caramel perfection.
The 5‑Minute Rest That Changes Everything
After baking, let the caramelized Crispix rest for 5 minutes on the sheet. This short rest allows the glaze to set properly, preventing it from sliding off when you stir. A quick rest also gives the sugar crystals a chance to stabilize. Skipping this step can lead to a messy, uneven coating. The result is a glossy, even finish.
Use a Cooling Rack for Crispier Results
Once the caramel is set, transfer the bowl of cereal onto a cooling rack. The airflow underneath keeps the bottom from becoming soggy. If you leave it on a flat surface, the caramel can soften from its own heat. A rack also makes it easier to portion out servings. This trick is a game‑changer for those who love crunch.
Stirring Technique Matters
When you stir the caramel after baking, use a gentle back‑and‑forth motion. Avoid aggressive stirring that can break the glaze’s structure. The goal is to distribute the caramel evenly without tearing the coating. This subtle technique keeps the texture intact and the flavor balanced.
Seasonal Sweetness Adjustment
If you’re making this in the summer, you might want to add a splash of lemon juice to cut the sweetness slightly. The acidity brightens the caramel and adds a subtle tang that pairs well with the buttery base. A teaspoon is enough; you don’t want to overpower the flavor. This tweak is perfect for hot days when you want a lighter dessert.
Creative Twists and Variations
This recipe is a playground. Here are some of my favorite ways to switch things up:
Nutty Crunch Edition
Add a cup of toasted pecans or walnuts for an extra layer of crunch. The nuts’ natural oils will mingle with the caramel, creating a rich, nutty flavor. This variation is great for autumn gatherings. The texture becomes even more exciting.
Chocolate‑Covered Delight
After the caramel sets, drizzle melted dark chocolate over the top. The chocolate will harden into a glossy shell, adding a bittersweet finish. This version is perfect for chocolate lovers and makes for a stunning presentation.
Spiced Caramel Surprise
Stir in a pinch of ground cinnamon or nutmeg before adding the vanilla. The spices give the caramel a warm, aromatic note. This variation is ideal for fall or winter parties. The spices enhance the caramel’s depth.
Sea‑Salted Sweetness
Sprinkle a generous pinch of flaky sea salt on top after baking. The salt sharpens the caramel’s sweetness and adds a delightful contrast. This simple tweak turns the dessert into a gourmet treat. Guests will love the sweet‑and‑salty combination.
Vegan Version
Replace unsalted butter with coconut oil and use a plant‑based brown sugar. The coconut oil adds a subtle tropical flavor that pairs well with the caramel. This version is dairy‑free and still satisfies the sweet tooth. It’s a great option for vegan friends.
Holiday Spice Blend
Incorporate a dash of allspice, clove, and ginger into the caramel. The warm spices evoke holiday comfort and make the dessert festive. This variation is perfect for Christmas or Thanksgiving. The spices add complexity to the caramel.
Storing and Bringing It Back to Life
Fridge Storage
Store the caramelized Crispix in an airtight container at room temperature for up to 3 days. The caramel will firm up, maintaining its crunch. If it becomes too hard, let it sit at room temperature for a few minutes before serving. This method preserves the texture.
Freezer Friendly
For longer storage, freeze the cereal in a single layer on a baking sheet, then transfer to a freezer bag. It can stay frozen for up to 2 weeks. Thaw at room temperature or in the microwave for a few seconds. The caramel will soften slightly, but the crunch remains.
Best Reheating Method
To revive the caramel, place the frozen or chilled cereal in a preheated oven at 300°F for 5 minutes. The gentle heat will soften the glaze without melting it. Alternatively, microwave on low for 20 seconds, then let it rest. Adding a tiny splash of water before reheating steams the caramel back to perfection.