I was standing in my kitchen, staring at a pan that had just turned a sad shade of charcoal, when my roommate walked in and dared me to make something that would make his taste buds do a hula. I laughed, I shrugged, and I grabbed the only thing that felt like a safe bet: chicken. But then I remembered a late‑night trip to a Hawaiian food truck where the garlic‑infused sauce was so bright it practically sang “Aloha!” to my palate. I thought, why not marry that island zing with the comfort of a fried chicken dinner? The result? A dish that shouts “vacation” while keeping you firmly planted at your own table.
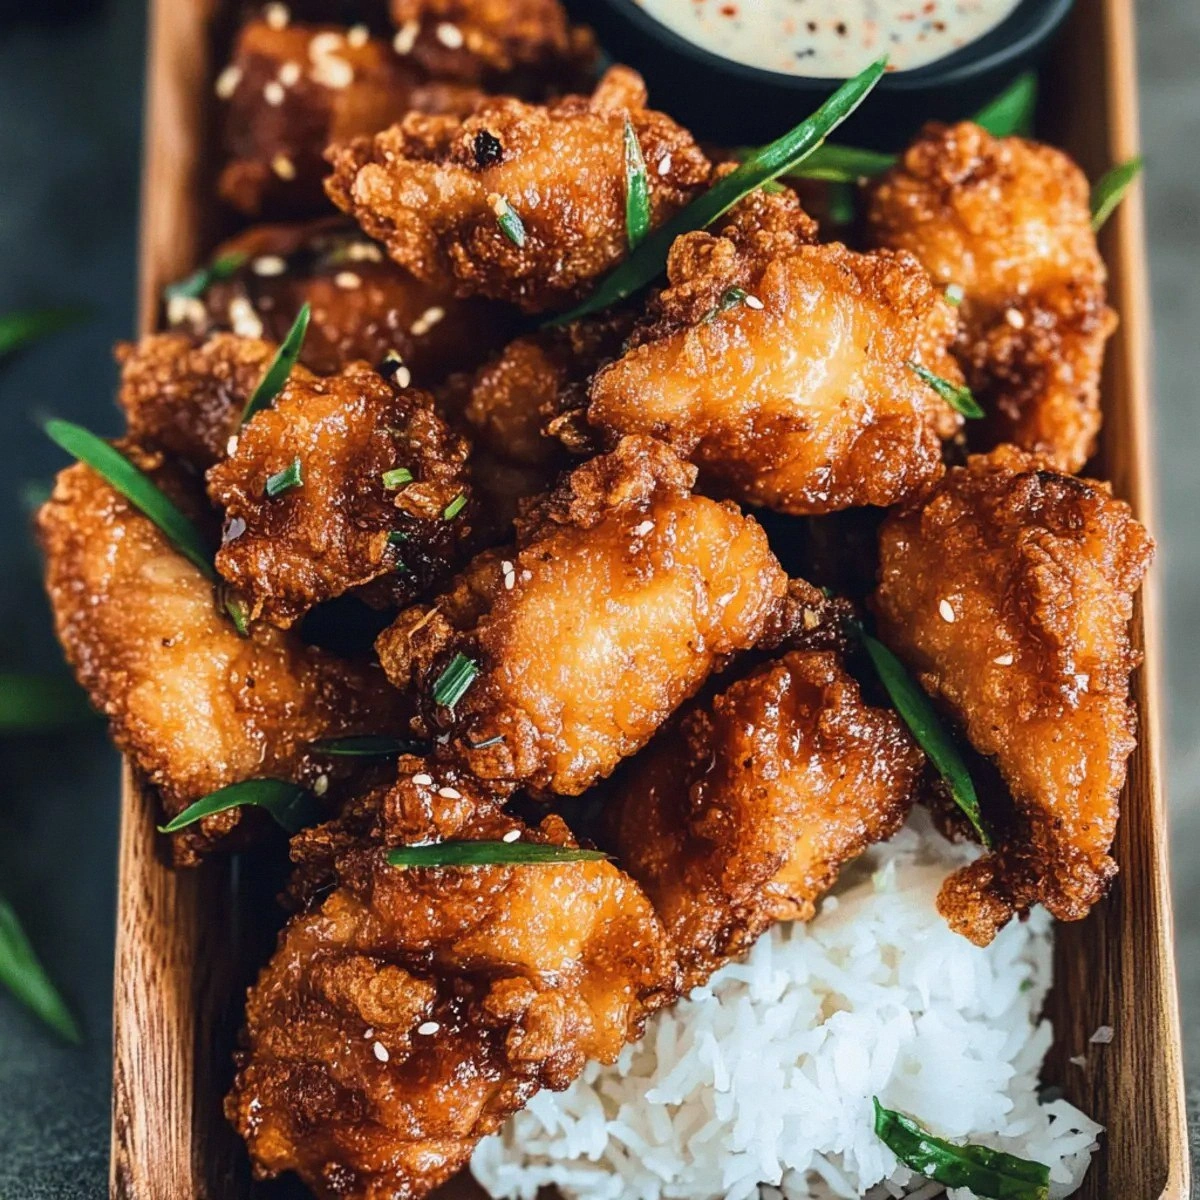
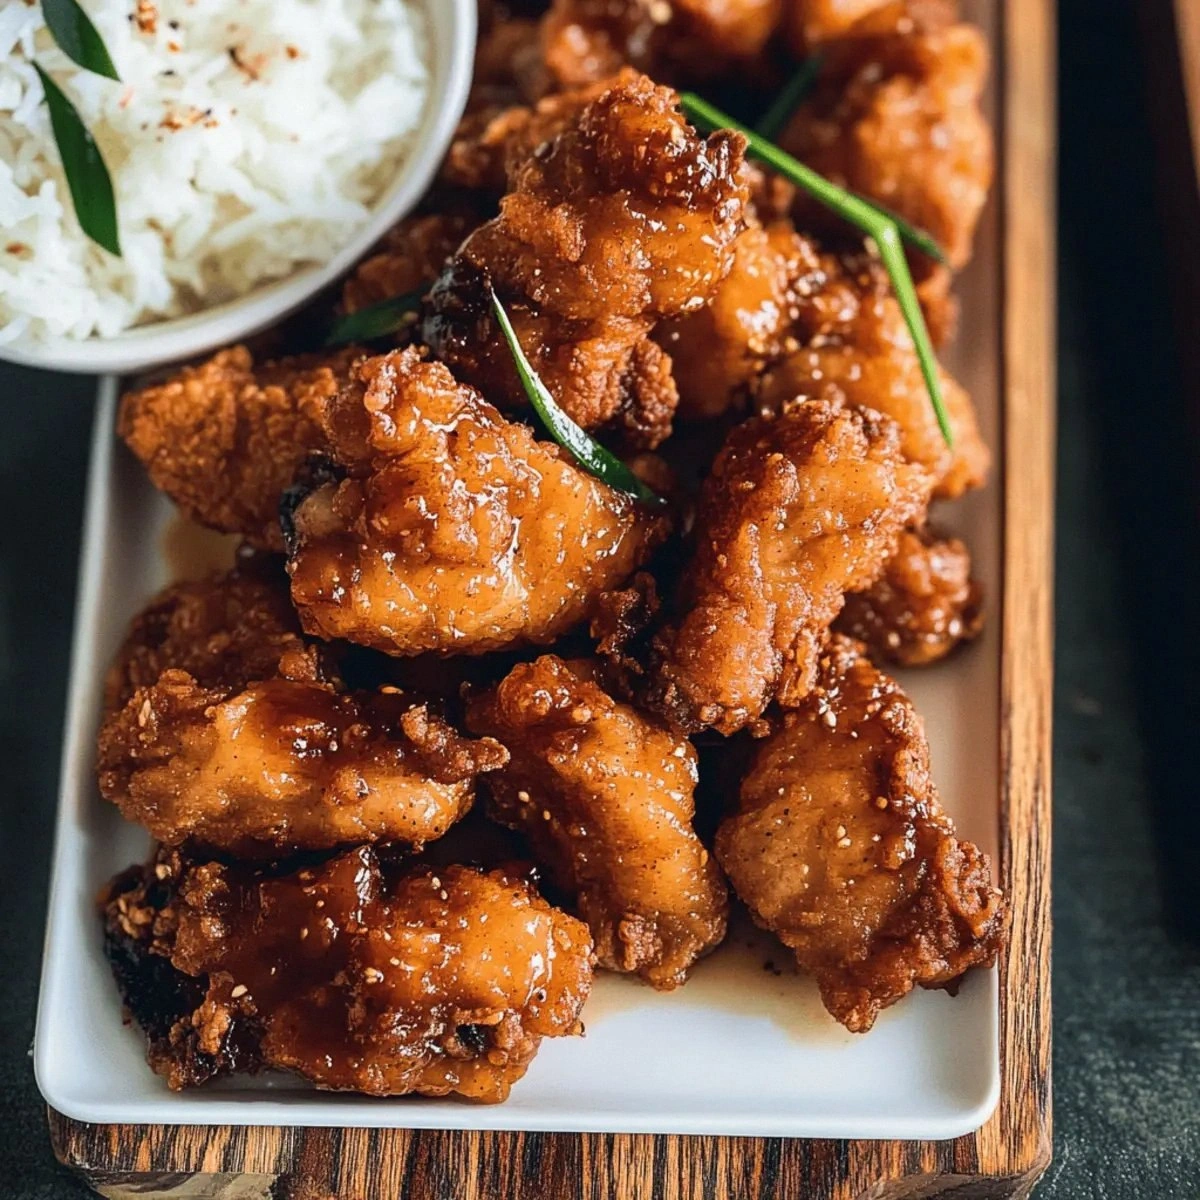
Picture this: the kitchen fills with the crackle of oil, the scent of caramelizing garlic swirling with a whisper of soy and sesame, and a faint heat from red chili flakes that makes your nose twitch in anticipation. The chicken pieces, coated in a golden‑brown crust, are crisp on the outside yet juicy enough to make a grown adult weep with joy. The green onions add a fresh pop that cuts through the richness like a cool ocean breeze. The whole thing sits on a plate that looks like a tropical sunset, and you can practically hear the waves crashing as you take that first bite.
Most fried garlic chicken recipes either drown the chicken in sauce or leave the flavor flat as a pancake. This version is different because the sauce is a glaze that clings to each bite, not a soggy pool that drowns the crunch. I’m talking about a glaze that’s sweet, salty, umami‑packed, and just a tad spicy—balanced like a perfectly tuned ukulele chord. And the secret? A double‑dredge of flour and cornstarch that gives you that satisfying snap that shatters like thin ice under a warm foot.
There’s also a little twist that most home cooks miss: a splash of sesame oil added right at the end, which adds a nutty depth you’ll swear you’ve never tasted before. I dare you to taste this and not go back for seconds. Let me walk you through every single step — by the end, you’ll wonder how you ever made it any other way.
What Makes This Version Stand Out
- Flavor Explosion: The soy‑sugar‑garlic glaze hits every taste bud like a tropical storm, delivering sweet, salty, and umami notes in perfect harmony.
- Crunch Factor: The double coating of flour and cornstarch creates a crust that cracks with every bite, offering a texture that’s both airy and sturdy.
- Simplicity: Only twelve ingredients, all pantry‑friendly, mean you won’t need a trip to a specialty store.
- Unique Aroma: The combination of garlic, sesame oil, and green onion creates a fragrance that fills the house like a Hawaiian luau.
- Crowd Magnet: This dish consistently gets rave reviews; even the pickiest eaters ask for the recipe.
- Ingredient Quality: Using fresh garlic and high‑sodium soy sauce ensures depth without needing a dozen extra spices.
- Cooking Method: Frying first locks in juices, then glazing finishes the flavor without sogginess.
- Make‑Ahead Potential: You can prep the coating and glaze ahead of time, then fry and glaze when you’re ready to serve.
Inside the Ingredient List
The Flavor Base
Soy sauce (3/4 cup) is the backbone of the glaze, providing salty umami that anchors the sweet sugar and garlic. If you’re watching sodium, you can swap half of it for low‑sodium soy sauce, but don’t go full low‑sodium—your glaze will lose that deep oceanic flavor. Sugar (3/4 cup) caramelizes during the glaze stage, giving that glossy, slightly sticky finish that clings to every bite. Garlic (1/2 cup, finely minced) is the star; its pungency mellows as it cooks, turning sweet and buttery, which is why the sauce feels like a warm hug for the chicken.
The Texture Crew
Flour (1 1/2 cups) and cornstarch (1/2 cup + 1 TBSP for coating) work together to create a light, airy crust. The flour gives structure, while cornstarch reduces gluten formation, ensuring the crust stays crisp rather than chewy. If you’re gluten‑free, substitute the flour with a 1:1 rice flour blend; the texture will remain delightfully crunchy. Salt (1/2 tsp) is minimal but essential for seasoning the coating, pulling moisture out of the chicken so the crust adheres better.
The Unexpected Star
Sesame oil (1 TBSP) is added at the very end of the glaze, delivering a nutty aroma that lifts the entire dish. A little goes a long way, so don’t overdo it or the flavor will dominate. Red chili flakes (1 tsp) give a gentle heat that dances on the tongue without overwhelming the sweet‑savory balance. White pepper (1/2 tsp) adds a subtle peppery bite that’s more aromatic than black pepper, perfect for a dish that leans toward the exotic.
The Final Flourish
Green onions (1/4 cup, sliced) are tossed in just before serving, adding a fresh, slightly sharp contrast to the rich glaze. They also provide a pop of color that makes the plate look Instagram‑ready. Vegetable oil (1 TBSP) is the frying medium; it has a high smoke point and a neutral flavor, letting the garlic and soy shine. If you prefer a richer taste, you can swap half the oil for clarified butter, but keep an eye on the temperature to avoid burning.
Everything's prepped? Good. Let’s get into the real action…
The Method — Step by Step
Cut the chicken into bite‑size pieces, pat them dry with paper towels, and set aside. Dryness is key; moisture will steam the coating instead of frying it. I like to season the pieces lightly with a pinch of salt and a dash of white pepper before coating, just to build layers of flavor. Let the seasoned chicken rest for five minutes while you prep the coating.
In a large bowl, whisk together the flour, 1/2 cup cornstarch, and 1/2 tsp salt. This dry mix is your first armor against the oil. Add the chicken pieces, tossing until each piece is evenly coated. For extra crunch, give the chicken a quick second dip: dip it in a bowl of beaten egg (optional) and then back into the flour mixture.
Heat a deep skillet or wok over medium‑high heat and add enough vegetable oil to reach about 1‑inch depth. When the oil shimmers (you’ll see tiny ripples), test it with a breadcrumb—if it sizzles and turns golden within 10 seconds, you’re ready.
Kitchen Hack: Use a candy thermometer; the ideal frying temperature is 350°F (175°C). Maintaining this heat ensures a golden crust without greasy interiors.Carefully add the coated chicken in batches; overcrowding the pan drops the oil temperature and leads to soggy pieces. Fry each batch for 3‑4 minutes, turning once, until the crust is a deep amber and the interior registers 165°F (74°C) on an instant‑read thermometer. As each batch finishes, transfer the pieces to a wire rack set over a baking sheet to drain excess oil.
While the last batch is frying, start the glaze. In a saucepan, combine soy sauce, sugar, minced garlic, sesame oil, red chili flakes, and the remaining 1 TBSP cornstarch dissolved in a splash of water. Bring to a gentle boil, stirring constantly; the cornstarch will thicken the sauce into a glossy, velvety coating.
When the glaze reaches a syrupy consistency, turn off the heat and stir in the sliced green onions. The residual heat will wilt them just enough to release their aroma without losing their bright color.
Return all the fried chicken pieces to the skillet (no oil needed) and pour the hot glaze over them. Toss gently with tongs, making sure every piece is drenched. The glaze should cling like a caramel coat, shimmering under the light.
Watch Out: If the glaze thickens too much after adding the chicken, add a splash of water or a dash more soy sauce to loosen it—otherwise you’ll end up with a sticky, hard crust.Give the chicken one final toss, then let it sit for two minutes. This short rest lets the glaze set, creating that perfect snap when you bite. Meanwhile, the kitchen will be filled with a scent that makes you want to dance the hula.
Serve immediately on a platter, garnish with extra green onion ribbons and, if you like, a sprinkle of additional red chili flakes for extra heat. Pair with steamed jasmine rice or a crisp cucumber salad to balance the richness. And there you have it—your very own Hawaiian fried garlic masterpiece.
That's it — you did it. But hold on, I've got a few more tricks that'll take this to another level...
Insider Tricks for Flawless Results
The Temperature Rule Nobody Follows
Keeping the oil at a steady 350°F is the secret to that perfect crunch. If the oil is too cool, the coating will soak up grease; too hot, and the exterior burns before the interior cooks. Use a thermometer and adjust the burner as needed. I once tried to eyeball it and ended up with soggy chicken that tasted like fried dough. Trust the numbers, and your crust will be as crisp as a fresh sea breeze.
Why Your Nose Knows Best
Before you even taste, your nose is already judging the dish. When the garlic starts to turn golden, that’s the cue that the flavor base is reaching its peak. If you smell a burnt note, lower the heat immediately. My friend once ignored the warning and ended up with a bitter aftertaste that no amount of sugar could fix. Let your olfactory senses be the guide—they’re more reliable than a timer.
The 5‑Minute Rest That Changes Everything
After glazing, let the chicken rest for exactly five minutes. This short pause lets the glaze set and the juices redistribute, preventing a dry bite. I used to serve straight from the pan and noticed the interior was slightly under‑cooked. Now, the rest period guarantees each piece is juicy, tender, and coated in that glossy glaze.
Double‑Dredge for Maximum Crunch
A quick dip in beaten egg before the second flour coating adds a binding layer that traps air, creating pockets of crunch. It sounds fancy, but it’s just a single extra step that transforms the texture. I tried it once and the crust was so light I could hear it crack like fresh ice under a foot. If you’re short on time, skip the egg, but don’t be surprised if the crunch isn’t as dramatic.
The Sweet‑Savory Balance Test
Before you finish the glaze, taste a tiny spoonful. If it leans too salty, a pinch more sugar will round it out; if it’s too sweet, a splash more soy sauce restores balance. This is where the magic happens—adjusting on the fly ensures the final dish hits that perfect harmony. One time I added too much sugar and ended up with a dessert‑like chicken; a dash of soy saved the day.
Creative Twists and Variations
This recipe is a playground. Here are some of my favorite ways to switch things up:
Pineapple Punch
Add 1/2 cup diced fresh pineapple to the glaze during the final simmer. The fruit’s acidity cuts through the sweetness, adding a tropical tang that brightens the dish. Kids love the surprise bursts of juice.
Spicy Mango Madness
Swap the red chili flakes for 1 tablespoon of mango habanero sauce. The mango brings a sweet heat that pairs beautifully with the garlic, creating a flavor profile that feels like a beach party in your mouth.
Coconut Crunch
Replace half of the flour with shredded unsweetened coconut. Fry as usual, and you’ll get a fragrant, slightly sweet crust that adds an extra layer of island authenticity.
Herb‑Infused Version
Stir in 1 tablespoon of chopped cilantro and a squeeze of lime juice right before serving. The herbaceous notes and citrus zing lift the dish, making it perfect for a summer BBQ.
Gluten‑Free Hero
Swap the flour for an equal amount of rice flour and the cornstarch for potato starch. The texture remains crisp, and you avoid gluten without sacrificing flavor.
Storing and Bringing It Back to Life
Fridge Storage
Place leftover chicken in an airtight container and store in the refrigerator for up to three days. The glaze will thicken; to revive, gently reheat in a skillet with a splash of water or chicken broth, stirring until the sauce loosens.
Freezer Friendly
Cool the chicken completely, then freeze in a single layer on a parchment sheet before transferring to a zip‑top bag. It will keep for up to two months. When ready, thaw overnight in the fridge and re‑fry briefly to restore crispness, then glaze again.
Best Reheating Method
For the ultimate reheated crunch, preheat your oven to 375°F (190°C), spread the chicken on a wire rack, and bake for 10‑12 minutes. Add a tiny splash of water to the pan before reheating to create steam that prevents the meat from drying out while the crust stays golden.