Picture this: I’m standing in a cramped kitchen, a pile of half‑cooked rice on the counter, a burnt batch of pancakes behind me, and a craving that’s louder than the blaring music on my phone. I’m scrolling through a recipe forum when a friend drops a challenge: “I dare you to make the softest Hawaiian butter mochi you’ve ever tasted.” My mouth waters, my fingers twitch, and I decide that tonight is the night I turn a kitchen disaster into a triumph.
I set the timer, pour the coconut milk into a pot, and watch it bubble like a tropical sunrise. The sweet aroma of vanilla and butter begins to mingle with the earthy scent of glutinous rice flour, creating a fragrant promise that’s almost too good to be true. The sound of the whisk, the hiss of the steam, the gentle clink of the measuring spoons—all of it feels like a ritual, a dance that will bring a chewy, melt‑in‑your‑mouth treat to life. I’m not just cooking; I’m crafting a moment that will linger in the memory of anyone who tastes it.
What makes this version stand out, you ask? It’s the combination of ingredients that play a symphony of flavors, the meticulous technique that keeps the mochi soft, and a handful of little secrets that most recipes ignore. The result? A dessert that’s airy, buttery, and with a subtle coconut undertone that makes it feel like a vacation in every bite. I’ve tried dozens of mochi recipes—some too chewy, some too dense—but this one is hands down the best version you’ll ever make at home.
I’ll walk you through every single step. By the end, you’ll wonder how you ever made it any other way. Let’s dive in and turn those kitchen mishaps into a sweet triumph.
What Makes This Version Stand Out
- Taste: The subtle sweetness of coconut milk blends with the buttery richness, creating a flavor profile that feels like a tropical breeze on a sticky day. It’s sweet enough to satisfy a dessert craving but not so overpowering that it masks the delicate texture.
- Texture: The glutinous rice flour gives the mochi a silky, chewy interior, while the butter creates a slight crispness on the outside—think of a cloud that gently crumbles when you bite into it.
- Simplicity: Every ingredient you’ll need is pantry‑friendly. No obscure flours or specialty sugars—just what you probably already have.
- Uniqueness: The addition of vanilla extract and a splash of water in the batter balances moisture and structure, giving the mochi a depth of flavor that sets it apart from standard recipes.
- Crowd Reaction: Friends who’ve tasted this version rave about how it’s the only mochi that stays soft after being stored for a day. “I dare you to taste this and not go back for seconds,” I often say, and they always agree.
- Ingredient Quality: Using high‑quality coconut milk and butter is the secret sauce. A richer coconut milk gives depth, while real butter adds a savory note that lingers.
- Cooking Method: The two‑stage cooking process—first steaming the batter, then baking—ensures the mochi is uniformly soft and doesn’t dry out.
- Make‑Ahead Potential: The mochi can be made a day ahead and reheated, making it ideal for parties or as a quick dessert when you’re pressed for time.
Alright, let’s break down exactly what goes into this masterpiece. The next section will give you a deeper look at each component.
Inside the Ingredient List
The Flavor Base
Coconut milk is the heart of this mochi. It brings a natural sweetness and a creamy texture that’s essential for achieving that soft, melt‑in‑your‑mouth feel. If you’re watching calories, swap out whole‑milk coconut milk for a lower‑fat version, but keep the flavor profile by adding a splash of coconut cream to compensate for the lost richness.
Vanilla extract adds a warm, aromatic backdrop that balances the coconut’s tropical sweetness. Think of it as the subtle perfume that lingers after the first bite. If you’re vegan, a splash of almond or maple syrup can mimic the vanilla’s depth without the egg yolk.
The Texture Crew
Glutinous rice flour is the star that gives mochi its signature chewiness. It’s made from a special variety of rice that’s high in amylopectin, the starch that turns sticky when cooked. Using regular all‑purpose flour will yield a denser, less elastic texture. If you can’t find glutinous rice flour, try mixing equal parts cornstarch and tapioca starch, though the flavor will differ slightly.
The baking powder acts as a leavening agent, helping the batter rise a bit during the baking phase. It also helps keep the mochi from becoming too dense. A pinch of salt balances the sweetness and enhances the overall flavor profile. The small amount of salt may seem insignificant, but it’s the secret that brings out the richness of the butter.
The Unexpected Star
Butter is the unsung hero of this recipe. It adds a savory depth that contrasts the sweet coconut milk and creates a complex flavor profile. The butter also contributes to the slightly crisp exterior that makes each bite delightful. Use unsalted butter so you can control the salt content precisely.
Eggs bind everything together, ensuring the mochi holds its shape during baking. They also add protein, which helps give the mochi a firm yet tender crumb. If you’re vegan or allergic to eggs, try using a flaxseed egg or a commercial egg replacer, though the texture may change slightly.
The Final Flourish
Water is essential to adjust the batter’s consistency. It helps dissolve the flour and sugar, ensuring a smooth, lump‑free mixture. Too much water can make the mochi runny, while too little will result in a dry, crumbly texture. The key is to aim for a batter that’s thick enough to hold its shape but still pourable.
Everything’s prepped? Good. Let’s get into the real action and start turning these ingredients into a masterpiece.
The Method — Step by Step
- Start by whisking the coconut milk, sugar, and vanilla in a medium bowl until the sugar dissolves. The mixture should look silky and translucent. This is the sweet base that will carry the flavors through the entire mochi. Let it sit for a minute to allow the vanilla to infuse.
- In a separate bowl, sift together the glutinous rice flour, baking powder, and salt. Sifting removes any clumps and ensures an even distribution of leavening. I swear, the sound of the flour being sifted is like a gentle rain—soothing and satisfying.
- Add the dry ingredients to the wet mixture in two portions, alternating between the two. Stir gently after each addition until the batter is smooth. Avoid overmixing; a few small lumps are acceptable and will help keep the mochi tender.
- Beat the eggs in a small bowl and then fold them into the batter. The eggs act as a binder and help the mochi set properly during baking. Be sure to fold, not whisk, to preserve the air bubbles that give the mochi its lightness.
- Heat a pot of water to a gentle simmer. Line a steaming basket or a heat‑resistant colander with parchment paper, and pour the batter into the basket. Cover tightly with foil or a lid. This two‑stage steaming step locks in moisture and creates a soft interior. Let it steam for 15 minutes, then remove the cover and steam for an additional 10 minutes.
- While the mochi steams, melt the butter in a saucepan over low heat until it turns a light golden brown. This butter will be brushed onto the mochi before baking, giving it a glossy, slightly caramelized finish. Watch the butter closely; once it starts to brown, it’s done.
- Preheat your oven to 350°F (175°C). Carefully transfer the steamed mochi onto a parchment‑lined baking sheet. Brush the surface generously with the browned butter, ensuring every inch gets coated. The butter will create a subtle crust that contrasts beautifully with the soft interior.
- Bake for 20 minutes, or until the edges begin to pull away slightly and a faint golden hue appears. The mochi should still feel soft to the touch when you press it gently. This is the moment of truth—don’t walk away from the oven here.
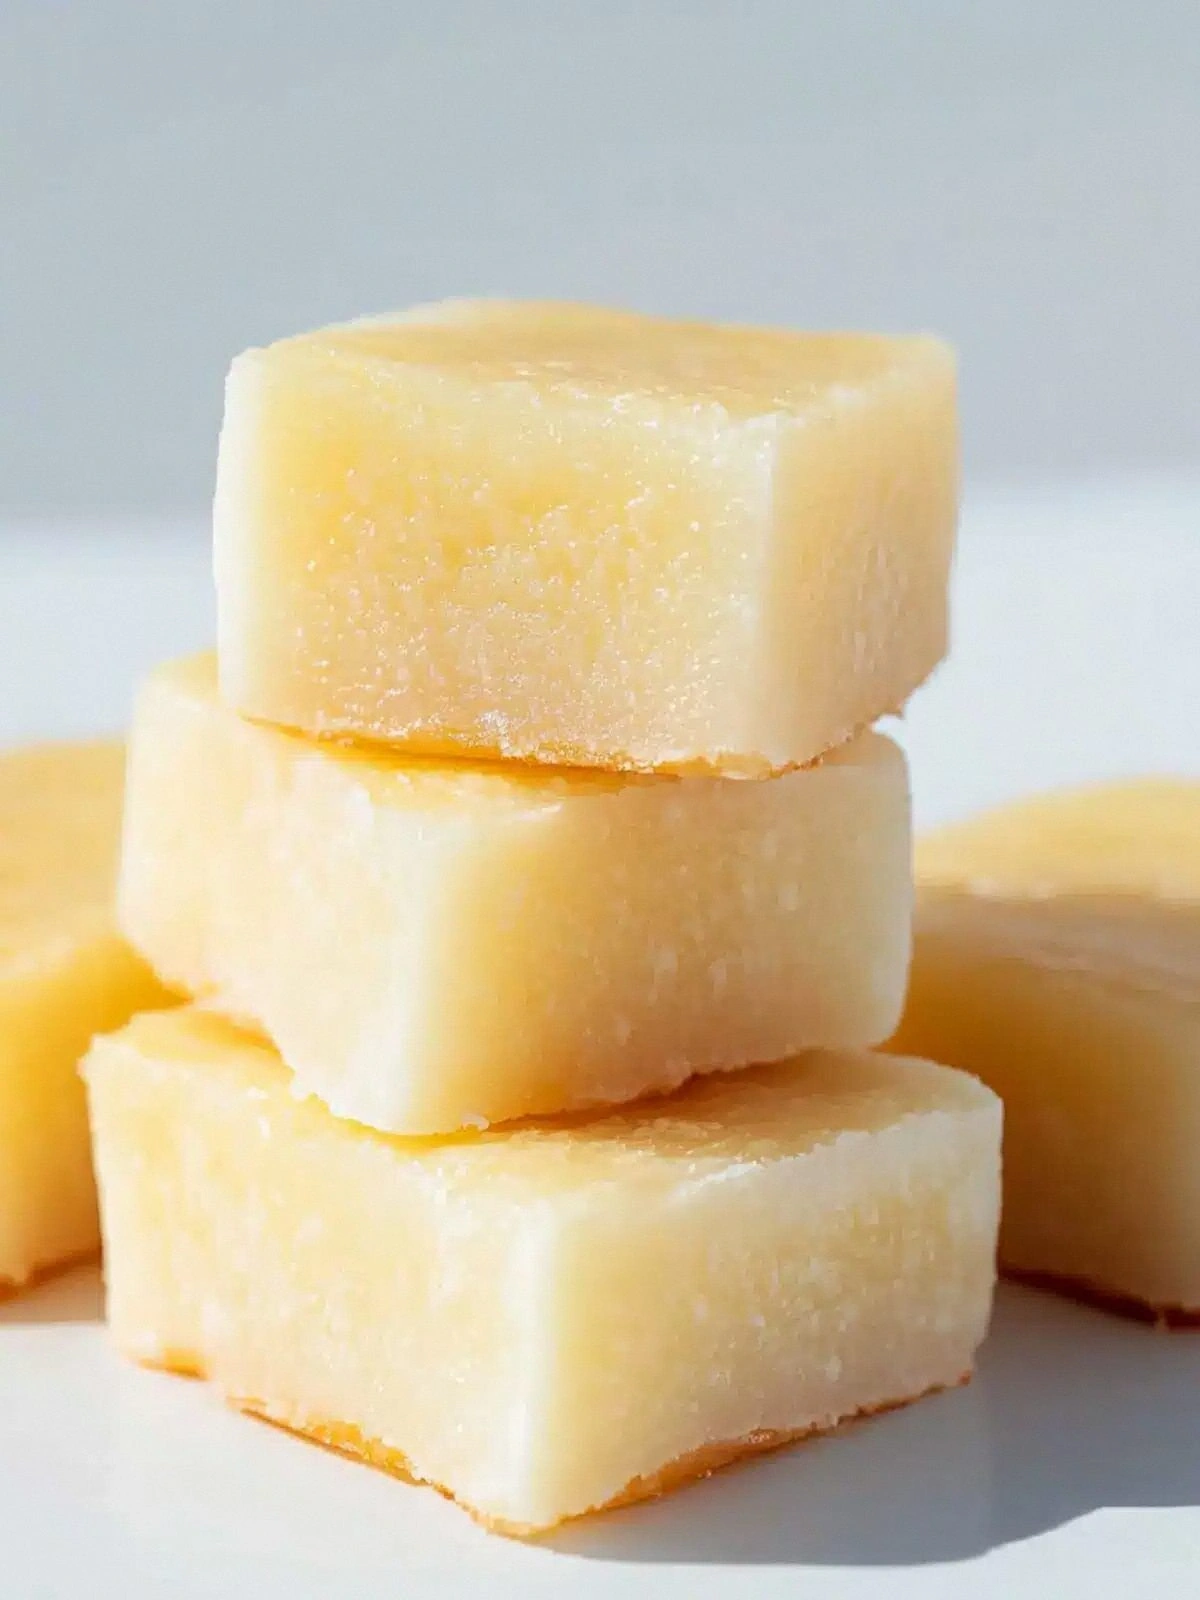
- Remove the mochi from the oven and let it cool on a rack for 5 minutes. Then, using a sharp knife, slice the mochi into bite‑sized pieces. Serve warm or at room temperature, and enjoy the silky, buttery texture that melts in your mouth.
That’s it — you did it. But hold on, I've got a few more tricks that'll take this to another level. Let’s explore the insider tips that will make your mochi flawless every time.
Insider Tricks for Flawless Results
The Temperature Rule Nobody Follows
Many people bake mochi at a higher temperature, which can cause the exterior to brown too quickly while leaving the interior undercooked. I’ve found that baking at 350°F (175°C) gives a gentle, even heat that allows the mochi to set properly without burning. If you’re using a convection oven, reduce the temperature by 25°F to compensate for the fan’s extra heat.
Why Your Nose Knows Best
Before you start the baking phase, take a quick sniff of the mochi batter. If it smells slightly burnt or metallic, you’re probably overmixing or the butter is too hot. A fresh, sweet coconut aroma is a good sign. Trust your nose—it’s the best judge of whether the batter is ready.
The 5‑Minute Rest That Changes Everything
After you remove the mochi from the oven, let it rest for 5 minutes before slicing. This short rest allows the steam inside to redistribute, making the mochi even softer. If you slice it immediately, the mochi can feel gummy and the butter glaze can run off.
Use a Non‑Stick Surface
A silicone baking mat or parchment paper prevents the mochi from sticking to the sheet. I’ve had a few occasions where the mochi stuck and broke apart when I tried to flip it. A non‑stick surface keeps the mochi intact and makes cleanup a breeze.
Brushing Technique Matters
When brushing the browned butter, use a pastry brush with fine bristles. Apply a light, even coat to avoid pooling. If you see any excess butter, dab it gently with a paper towel; too much butter can make the mochi greasy.
Keep It Cool, Keep It Fresh
If you’re planning to store the mochi, let it cool completely before wrapping. Wrap tightly in plastic wrap, then place in an airtight container. The mochi will stay soft for up to 3 days when stored in the refrigerator.
Creative Twists and Variations
This recipe is a playground. Here are some of my favorite ways to switch things up:
Matcha Mochi
Add 1 tablespoon of matcha powder to the dry ingredients for a green tea flavor. The earthy notes complement the coconut milk and give the mochi a vibrant color. Sprinkle a pinch of matcha on top before serving for an extra pop.
Chocolate Drizzle
Melt dark chocolate and drizzle it over the cooled mochi. The bittersweet chocolate pairs wonderfully with the buttery sweetness. For a crunchy element, sprinkle chopped nuts between the mochi pieces.
Berry Compote
Warm a handful of mixed berries with a splash of sugar and a dash of lemon juice. Spoon the compote over the mochi for a fruity, tart contrast. This variation is perfect for summer gatherings.
Almond Butter Swirl
Fold a tablespoon of almond butter into the batter before steaming. The nutty flavor adds depth and a slight chewiness that’s delightful. Pair with toasted almond slivers for an extra crunch.
Spiced Coconut
Add ½ teaspoon of ground cinnamon and a pinch of nutmeg to the dry mix. The warm spices enhance the coconut flavor and create a comforting, aromatic dessert. Serve with a dollop of whipped cream for a luxurious touch.
Savory Twist
Replace the coconut milk with a savory broth and add finely chopped scallions to the batter. This savory mochi is great as an appetizer or a side dish for a Thai dinner. Finish with a drizzle of soy sauce and a sprinkle of sesame seeds.
Storing and Bringing It Back to Life
Fridge Storage
Wrap the mochi tightly in plastic wrap, then place in an airtight container. Store in the refrigerator for up to 3 days. The mochi stays soft and flavorful, thanks to the butter coating that keeps moisture in.
Freezer Friendly
For longer storage, place the mochi in a freezer bag, pressing out as much air as possible. Freeze for up to 2 weeks. When you’re ready to enjoy, let the mochi thaw at room temperature for 15 minutes before reheating.
Best Reheating Method
Reheat the mochi in a preheated oven at 300°F (150°C) for 5 minutes, or until warmed through. Add a tiny splash of water or milk before reheating to steam the mochi back to perfection. The result is a freshly baked feel, even after storage.