I was standing in my kitchen, the clock ticking, the pan humming, and a sudden craving for something sharp, tangy, and instantly addictive hit me like a flash of lightning. I grabbed a red onion, sliced it thin, and tried to improvise a quick pickle with whatever I had on hand. The result? A bright, glossy jar of onions that sang louder than my neighbor’s karaoke night. I dared myself to taste it before anyone else could even sniff the aroma, and let’s just say I didn’t make it past the first handful. That moment of reckless indulgence sparked a revelation: the world needs a pickled onion that’s faster than a microwave, brighter than a sunrise, and tastier than a gourmet kitchen’s secret stash.
Picture this: the deep magenta of a fresh red onion, sliced into paper‑thin ribbons that flutter like confetti. The kitchen fills with a sharp, vinegary snap that makes your nose do a little happy dance, while a subtle sweetness sneaks in, balancing the bite like a perfectly timed drum roll. You hear the faint sizzle as the sugar dissolves, the faint clink of a spoon against the glass, and the soft pop of a lid sealing in the magic. The texture? Crunchy enough to bite through, yet tender enough to melt on your tongue, delivering a flavor punch that lingers like a good joke after the punchline.
Most pickled onion recipes either take days to develop or drown the onion in a sea of vinegar, losing that essential snap. This version, however, flips the script: a 10‑minute simmer, a quick cool, and you’ve got a condiment that can elevate tacos, burgers, salads, or even a simple cheese board. I’ll be honest — I ate half the batch before anyone else got a taste, and I’m still not sorry. The secret? A dash of sugar, a pinch of sea salt, and a splash of white vinegar that together create a brine that coats each slice like a silk scarf, preserving the onion’s natural sweetness while adding a zing that makes you gasp.
If you’ve ever struggled with soggy, bland pickles that taste like diluted vinegar, you’re not alone. I’ve tried every shortcut, from microwave hacks to instant‑mix packets, and most recipes get this completely wrong. Here’s what actually works: a precise balance of acidity, a measured dose of sugar, and a brief heat‑treatment that activates the onion’s natural enzymes. The result is a jar of onions that stay crisp for weeks, with a flavor that only deepens over time. I dare you to taste this and not go back for seconds — it’s that good.
Okay, ready for the game‑changer? Let me walk you through every single step — by the end, you’ll wonder how you ever made it any other way. Stay with me here — this is worth it.
What Makes This Version Stand Out
- Taste: The sweet‑vinegar balance hits your palate like a perfectly tuned chord, bright enough to cut through rich dishes yet mellow enough to complement delicate salads.
- Texture: A quick 5‑minute simmer locks in that satisfying crunch, so each bite feels like biting into a fresh onion that’s been given a luxurious makeover.
- Simplicity: Only six pantry staples are needed, and the entire process fits into a single 15‑minute window — ideal for busy weeknights.
- Uniqueness: The addition of whole peppercorns and a bay leaf infuses a subtle aromatic depth that most quick‑pickles completely miss.
- Crowd Reaction: Serve these at a gathering and watch guests fight over the jar; they’ll swear you’re a culinary wizard.
- Ingredient Quality: Using a good‑quality white vinegar (not the cheap distilled stuff) ensures a clean, bright tang without any off‑notes.
- Method: A brief heat‑step activates the onion’s natural sugars, creating a brine that adheres like velvet.
- Make‑Ahead Potential: The flavor improves after 24 hours, giving you a ready‑to‑go condiment that lasts up to a month in the fridge.
Inside the Ingredient List
The Flavor Base
White vinegar is the hero of the brine, delivering that sharp, clean acidity that makes pickled onions sing. Choose a distilled white vinegar with at least 5% acidity for a crisp bite; if you opt for apple cider vinegar, expect a fruitier undertone that can mask the onion’s natural sweetness. Skipping the vinegar altogether results in a soggy, flavor‑less mess, so never, ever, cut this out.
The Texture Crew
Red onions themselves are the texture anchor. Their natural layers create a crunchy bite that holds up under the brine. If you grab a yellow or white onion, you’ll lose that vibrant magenta hue and the subtle sweetness that red onions bring. When selecting, look for firm, glossy bulbs with dry skins — any signs of sprouting mean they’re past their prime and will turn mushy.
The Unexpected Star
A pinch of sugar isn’t just for sweetening; it balances the vinegar’s sharp edge and helps the brine cling to each slice, creating a glossy finish. You can swap regular granulated sugar for raw honey for a more complex flavor, but remember honey adds its own moisture, so reduce the water slightly. Forgetting the sugar? Expect a harsh, astringent bite that feels like chewing on a sour candy gone wrong.
The Final Flourish
Sea salt, whole peppercorns, and a bay leaf are the subtle aromatics that elevate this quick pickle from “good” to “wow”. Salt enhances the onion’s natural flavor and draws out moisture, while the peppercorns add a gentle heat, and the bay leaf contributes a whisper of earthiness. If you’re allergic to pepper, a pinch of crushed red pepper flakes can substitute, but use sparingly to avoid overpowering the delicate balance.
Everything's prepped? Good. Let’s get into the real action…
The Method — Step by Step
Start by peeling the red onion and slicing it into thin, uniform ribbons. I recommend using a mandoline set to its finest setting; the slices should be about 2‑3 mm thick, almost translucent. As you slice, you’ll hear that satisfying, rhythmic click‑clack of the blade — a sound that promises crispness. Once sliced, toss the ribbons into a large, heat‑proof bowl and set aside. Pro tip: If you’re short on time, a sharp chef’s knife works, just keep the cuts even.
Kitchen Hack: After slicing, rinse the onions briefly under cold water and pat dry. This removes excess surface starch, ensuring the brine adheres evenly.In a small saucepan, combine ½ cup white vinegar, ¼ cup water, 2 tablespoons granulated sugar, and 1 teaspoon sea salt. Place the saucepan over medium heat and stir gently until the sugar and salt dissolve completely. You’ll notice a faint steam rising — that’s the brine waking up, ready to do its job. Let the mixture come to a gentle boil; you should hear a low, steady bubbling, not a frantic roar. Once it reaches a steady boil, remove it from the heat and let it sit for a minute to settle.
While the brine rests, add ½ teaspoon whole black peppercorns and a single bay leaf to the bowl of sliced onions. The peppercorns will release a subtle peppery note, and the bay leaf adds an earthy undertone that deepens the overall flavor. Toss the onions gently to distribute the spices evenly; you’ll feel the onions slightly soften as the spices coat them.
Now, the moment of truth: pour the hot brine over the onions. As the liquid hits the onions, you’ll hear a soft sizzle — that’s the sound of the onions instantly absorbing the acidity. Give everything a quick stir with a wooden spoon, making sure every slice is submerged. If any onions peek above the surface, press them down with the back of the spoon; you want full contact for uniform pickling.
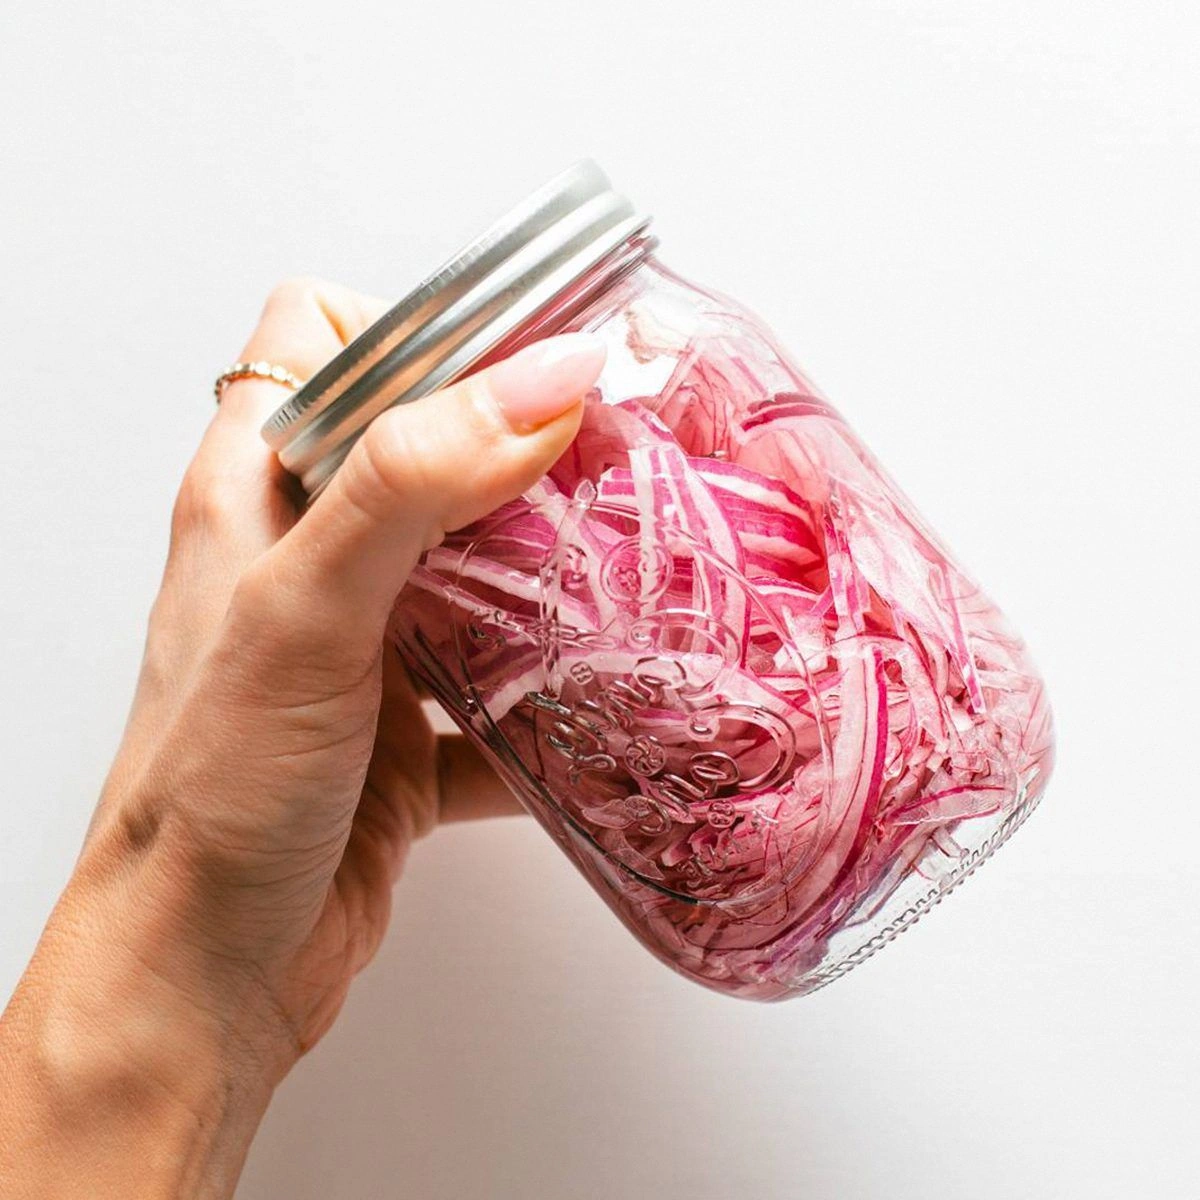
Transfer the entire mixture into a clean glass jar (a 16‑oz mason jar works perfectly). Seal the jar tightly with its lid. Let the jar sit at room temperature for about 15 minutes; during this time, the onions will start to soften and the colors will intensify, turning a richer, glossy magenta.
Watch Out: Do not use a metal lid that isn’t sealed; an ill‑fitting lid can let air in, causing the onions to turn mushy or develop off‑flavors.After the 15‑minute room‑temp rest, place the jar in the refrigerator. The cooling period is crucial: the cold slows down the enzymatic breakdown, preserving that coveted crunch. Let the onions chill for at least 30 minutes before serving — this is when the flavors truly meld. If you’re impatient, you can taste after 10 minutes, but the full flavor profile emerges after the first hour.
When you’re ready to serve, give the jar a gentle shake to redistribute any settled brine. Scoop out a generous spoonful and toss them onto tacos, burgers, salads, or even a simple avocado toast. The onions should have a glossy sheen and a firm bite that snaps cleanly between your teeth, delivering that sweet‑vinegar pop you’ve been dreaming of.
Store the remaining onions in the refrigerator, sealed tightly. They’ll stay crisp and flavorful for up to 4 weeks, and the taste actually deepens with each passing day. If you notice any cloudiness in the brine, it’s perfectly normal — just give the jar a quick shake before using.
That's it — you did it. But hold on, I've got a few more tricks that'll take this to another level…
Insider Tricks for Flawless Results
The Temperature Rule Nobody Follows
Never pour cold brine over hot onions or vice versa. The temperature shock can cause the onion cells to rupture, leading to a mushy texture. Instead, bring the brine to a gentle boil, then let it rest for a minute before pouring over the warm‑ish onions. I once tried a shortcut by using room‑temperature vinegar straight from the fridge, and the result was a soggy disaster that tasted flat. Keep the heat consistent, and the onions stay crisp.
Why Your Nose Knows Best
When the brine is simmering, trust your sense of smell more than the timer. A faint, sweet aroma means the sugar has fully dissolved; a sharp, acidic scent signals the vinegar is fully integrated. If you ever smell a burnt note, pull the pan off the heat immediately — that burnt flavor will cling to the onions forever. Your nose is the ultimate quality control tool.
The 5‑Minute Rest That Changes Everything
After sealing the jar, let it sit untouched for exactly five minutes before moving it to the fridge. This short pause allows the brine to penetrate the outer layers of the onion, creating a uniform flavor foundation. Skipping this step results in a jar where the outer rings taste bright while the core remains bland. It’s a tiny window of patience that yields a massive payoff.
Peppercorn Power
Whole peppercorns release their flavor slowly, providing a subtle heat that doesn’t overwhelm. If you prefer a bolder kick, lightly crush the peppercorns before adding them; this increases surface area and extracts more spice. One friend tried skipping the pepper entirely — the resulting onions felt flat, like a song missing its bass line.
Seal it Tight, Seal it Right
A loose lid is the silent killer of pickles. Air seeps in, encouraging oxidation and eventual mushiness. I recommend wiping the rim of the jar with a clean cloth before sealing, ensuring a perfect seal. If you hear a faint “pop” when the lid closes, you’ve nailed it; no pop means you need to press harder or check the lid threads.
Creative Twists and Variations
This recipe is a playground. Here are some of my favorite ways to switch things up:
Spicy Chili Burst
Add ½ teaspoon red pepper flakes to the brine for a gentle heat that lingers on the palate. Perfect for topping tacos or grilled corn, the chili notes complement the onion’s sweetness without stealing the show.
Herbaceous Garden
Swap the bay leaf for a sprig of fresh thyme or rosemary. The herb’s fragrant oils infuse the onions with a woodsy aroma, making them ideal for charcuterie boards or as a garnish for roasted vegetables.
Sweet‑Citrus Fusion
Replace half the water with freshly squeezed orange juice and add a thin slice of orange zest to the brine. This creates a bright, citrusy twist that pairs beautifully with fish tacos or summer salads.
Asian‑Inspired
Introduce 1 tablespoon soy sauce, ½ teaspoon toasted sesame oil, and a few slices of fresh ginger to the brine. The result is a savory‑sweet pickled onion that shines on ramen bowls or rice paper rolls.
Smoky BBQ
Add ½ teaspoon smoked paprika and a dash of liquid smoke to the brine. The smoky depth pairs wonderfully with grilled meats, giving you a quick “BBQ‑style” topping without the long smoke session.
Storing and Bringing It Back to Life
Fridge Storage
Keep the pickled onions in a clean glass jar with a tight‑fitting lid. They stay crisp for up to four weeks, though the flavor intensifies after the first 48 hours. For best texture, avoid exposing the jar to temperature fluctuations — a steady 4 °C (39 °F) fridge is ideal.
Freezer Friendly
Yes, you can freeze them! Portion the onions into freezer‑safe bags, removing as much air as possible. Thaw in the refrigerator overnight before using; they’ll retain most of their crunch, especially if you add a splash of fresh brine after thawing.
Best Reheating Method
If you need to warm the onions (for a hot sandwich or a sizzling taco), sprinkle a tiny splash of water over the jar and microwave for 15‑20 seconds. The added moisture creates a gentle steam that revives the crispness without cooking the onions further.