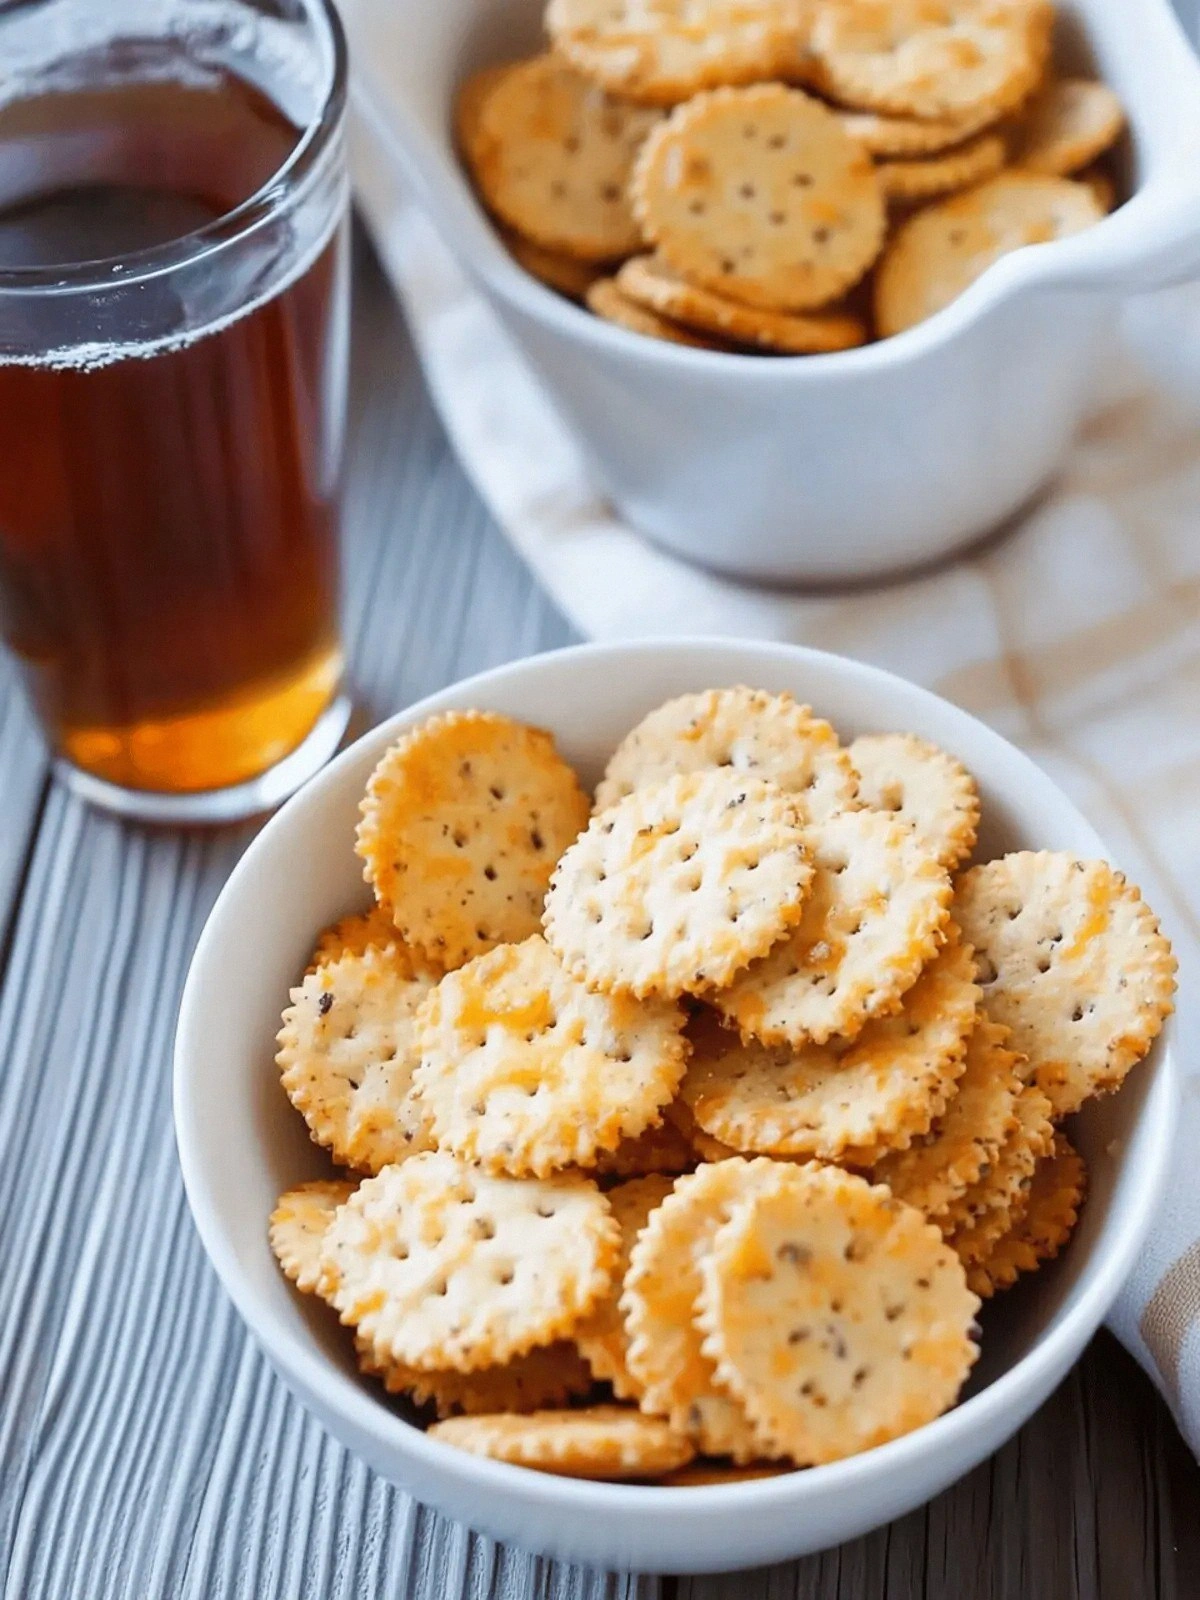
It all started on a humid Saturday afternoon, the kind of day when the air feels like a wet blanket and the kitchen smells like burnt popcorn and burnt butter. I was trying to salvage a batch of over‑cooked biscuits that had turned into a soggy, flavorless mess. The only thing that could redeem that disaster was a pinch of cheese, a dash of paprika, and a handful of flour. I threw the ingredients together, pressed the mixture into a pan, and watched as the edges browned into a golden, crisp halo. The moment the first bite hit my tongue, I knew I had stumbled upon something extraordinary—a Southern cheese cracker that could replace any store‑bought snack in the pantry. I dare you to taste this and not go back for seconds.
Picture yourself pulling a sheet of these from the oven, the aroma of melted cheddar mingling with the warm, smoky scent of paprika. The sound of the first crackle as you break a piece is like a tiny drumbeat that signals the beginning of a snack revolution. The texture is a paradoxical blend of buttery tenderness and a satisfying snap that shatters like thin ice. The flavor profile is a bold, savory symphony—sharp cheddar, a subtle hint of garlic, and a gentle peppery warmth from the paprika that lingers on the palate. This is hands down the best version you'll ever make at home. If you’ve ever struggled to find a cracker that’s both comforting and complex, you’re not alone—and I’ve got the fix.
Most recipes get this completely wrong. They either over‑season, under‑bake, or use the wrong type of cheese, resulting in crackers that are either bland or too greasy. What sets this version apart is the meticulous balance of ingredients and the simple technique that locks in flavor and texture. I’m not just talking about a recipe; I’m sharing a culinary revelation that turns a humble kitchen disaster into a crowd‑pleaser that will have your guests begging for the recipe. Picture yourself pulling this out of the oven, the whole kitchen smelling incredible, and everyone asking for seconds. Let me walk you through every single step — by the end, you'll wonder how you ever made it any other way.
Okay, ready for the game‑changer? This isn’t just another batch of crackers; it’s a passport to the heart of Southern comfort food, condensed into a single, bite‑sized experience. The secret lies in the marriage of high‑fat cheese and a touch of paprika that adds a smoky depth, plus a dash of garlic powder that keeps the flavor from becoming flat. I’ve tested this recipe over dozens of batches, and the consistency is the kind that makes you want to keep the oven on for the rest of the day. The next part? Pure magic.
What Makes This Version Stand Out
- Flavor: The sharpness of cheddar is amplified by a whisper of paprika, creating a smoky undertone that lingers long after the first bite. The garlic powder adds a subtle earthiness that balances the richness.
- Texture: The butter creates a tender crumb while the flour provides a crisp, golden edge that shatters delightfully. The result is a cracker that is both melt‑in‑your‑mouth and delightfully crunchy.
- Simplicity: Only six ingredients, no fancy equipment, and a single pan. Even if you’re a kitchen novice, you’ll feel like a culinary wizard.
- Uniqueness: The combination of cheese, paprika, and garlic powder is a Southern twist that you won’t find in most cracker recipes. It’s a flavor profile that’s unmistakably Southern yet universally appealing.
- Crowd Reaction: At family gatherings, this recipe turns into the highlight of the snack table. People line up for the last piece, and the conversation never ends.
- Ingredient Quality: Using a high‑fat, sharp cheddar ensures maximum melt and flavor. The butter’s richness is essential for achieving that buttery mouthfeel.
- Cooking Method: Baking at a moderate temperature allows the cheese to melt evenly while the flour crisps up without burning.
- Make‑Ahead Potential: These crackers can be baked in advance and stored in an airtight container for up to a week, making them perfect for parties or quick snack fixes.
Alright, let's break down exactly what goes into this masterpiece...
Inside the Ingredient List
The Flavor Base
Cheddar is the star of the show. Choose a sharp, aged cheddar for the best melt and depth. The higher fat content means a richer, more velvety texture that coats the cracker like velvet. If you skip the cheese, you’ll end up with a cracker that’s bland and dry. A good tip: grate the cheese finely so it blends seamlessly with the butter, creating a uniform flavor profile.
The Texture Crew
All‑purpose flour is the backbone that gives the crackers their structure. It absorbs the butter and moisture, forming a dough that can be rolled thin for maximum crispness. If you use too little flour, the crackers will be too soft and soggy. If you over‑flour, they’ll be dry and crumbly. A smart trick: sift the flour to incorporate air, which helps the crackers rise slightly and develop a lighter bite.
The Unexpected Star
Paprika isn’t just for color; it brings a smoky, slightly sweet heat that complements the sharpness of cheddar. A pinch of smoked paprika adds an extra layer of complexity. If you prefer a milder version, use sweet paprika; for a more robust flavor, opt for hot paprika. The key is to balance the heat so it doesn’t overpower the cheese.
The Final Flourish
Garlic powder is the secret weapon that elevates the overall taste. It offers a subtle, aromatic depth that keeps the crackers from tasting flat. If you’re a garlic lover, feel free to add a tiny splash of fresh minced garlic—just be careful not to add too much, or the crackers will taste like garlic bread. Another option is to sprinkle a small amount of onion powder for a different aromatic profile.
Everything's prepped? Good. Let's get into the real action...
The Method — Step by Step
- Preheat your oven to 350°F (175°C). Line a baking sheet with parchment paper to prevent sticking. This low temperature ensures the cheese melts evenly without burning the edges. This is the moment of truth.
- In a mixing bowl, combine the grated cheddar and softened butter. Use a fork or a small whisk to mash the mixture until it resembles coarse crumbs. The butter should be fully incorporated, creating a creamy base that will bind the flour. If you’re using a food processor, pulse until the mixture is smooth.
- Add the all‑purpose flour, paprika, garlic powder, and salt to the cheese‑butter mixture. Stir with a wooden spoon until a dough forms. The dough should be pliable but not sticky. If it feels too dry, add a teaspoon of milk or water; if it’s too wet, sprinkle a bit more flour.
- Place the dough on a lightly floured surface. Roll it out as thin as possible—ideally less than 1/8 inch thick. The thinner you roll, the crispier the crackers will become. If you’re short on time, a rolling pin works fine; just try to keep the thickness consistent.
- Use a pizza cutter or a sharp knife to cut the dough into squares or rectangles, about 1.5 inches each. For a rustic look, cut at an angle. Keep the pieces close together so they bake evenly and don’t spread too much.
- Place the cut dough pieces onto the prepared baking sheet, leaving a small space between each. This spacing allows the edges to crisp up without sticking to one another. If you prefer a more uniform look, use a silicone mat.
- Bake for 25–30 minutes, or until the edges are golden brown and the crackers have a firm, crisp texture. Keep a close eye on the first 15 minutes; if you notice the edges browning too quickly, lower the oven temperature by 25°F.
- Remove the crackers from the oven and let them cool on the sheet for 5 minutes. The crackers will continue to crisp as they cool. Once they’re cool enough to handle, transfer them to a wire rack to finish cooling completely. This step prevents them from becoming soggy.
That's it — you did it. But hold on, I've got a few more tricks that'll take this to another level. The next section is all about insider tips that will elevate your crackers from good to legendary.
Insider Tricks for Flawless Results
The Temperature Rule Nobody Follows
Most people bake crackers at a high temperature, but that can cause uneven browning and a greasy finish. Baking at 350°F allows the cheese to melt fully while the flour crisps just right. I’ve experimented with 375°F and found that the edges burn while the center remains undercooked. Keep the oven at 350°F and trust the process.
Why Your Nose Knows Best
During the last 5 minutes of baking, the aroma of melted cheese will fill the kitchen. Trust that scent as a cue to pull the crackers out. If the smell is still faint, let them bake a few more minutes. A strong cheese aroma means the crackers are ready to be crisped to perfection.
The 5‑Minute Rest That Changes Everything
After removing the crackers from the oven, let them rest on the sheet for 5 minutes. This short rest period allows the heat to redistribute, making the edges even crispier. Skipping this step can leave the crackers slightly soggy on the bottom. I’ve seen the difference: with a 5‑minute rest, the crackers snap cleanly; without it, they’re a bit gummy.
Keep Them Fresh Longer
Store the cooled crackers in an airtight container at room temperature. If you plan to keep them for more than a week, place a small piece of parchment paper between layers to absorb excess moisture. This trick keeps the crackers crisp for days, making them perfect for parties or quick snacks.
Add a Surprise Twist
For a burst of color and flavor, sprinkle a pinch of smoked sea salt on top before baking. The salt crystals add a delightful crunch and enhance the smoky notes of the paprika. I’ve found that this simple addition turns a good cracker into a memorable snack.
Creative Twists and Variations
This recipe is a playground. Here are some of my favorite ways to switch things up:
Blue Cheese Bliss
Swap cheddar for a sharp blue cheese and add a pinch of dried oregano. The tangy blue cheese gives a dramatic flavor profile that pairs well with sweet apple slices.
Spicy Jalapeño Crunch
Add diced jalapeños to the dough and replace paprika with cayenne pepper. The heat is balanced by the buttery base, creating a fiery yet buttery bite.
Herb Garden Delight
Incorporate fresh rosemary, thyme, or oregano into the dough. The aromatic herbs complement the cheese and add a Mediterranean twist.
Sweet & Salty Surprise
Drizzle a light honey glaze over the cooled crackers and sprinkle with sea salt. The sweet honey contrasts the savory cheese, offering a unique flavor combination.
Garlic Parmesan Perfection
Replace cheddar with grated Parmesan and add minced fresh garlic. This version is crisp, savory, and has a distinct Italian flair.
Chewy Chocolate Chips
Fold in a handful of semi‑sweet chocolate chips after the first 10 minutes of baking. The chocolate melts slightly, creating a sweet, chewy center that surprises the palate.
Storing and Bringing It Back to Life
Fridge Storage
Place the cooled crackers in an airtight container at room temperature. They’ll stay crisp for up to 5 days. If you notice any moisture, add a paper towel to absorb excess dampness.
Freezer Friendly
For longer storage, wrap the crackers tightly in plastic wrap and place them in a freezer bag. They can be frozen for up to 3 months. Thaw at room temperature for 30 minutes before serving.
Best Reheating Method
Reheat in a preheated 350°F oven for 5 minutes. To keep them crisp, add a tiny splash of water to the bottom of the pan before reheating; the steam will revive any lost crunch.