I remember the night I tried to impress my roommate with a quick breakfast, and the kitchen turned into a disaster zone. The batter looked like a lumpy pancake, the oven was too hot, and the cinnamon swirl turned into a sticky mess that clung to every surface. I stared at the stove, thinking, “This has to be better.” That moment sparked the creation of the most fluffy, cinnamon‑laden pancakes you’ll ever taste.
Picture a golden batter that rises like a cloud, the aroma of fresh cinnamon and butter drifting through the air, and the sound of a gentle sizzle as it hits the pan. Imagine biting into a pillowy roll that melts in your mouth, with a sweet, creamy glaze that coats each bite like velvet. That’s what this recipe delivers—every element is tuned to create a sensory explosion that feels like a hug in edible form.
What makes this version stand out is that it’s not just a pancake; it’s a cinnamon roll on a plate, and it’s made with a secret technique that keeps the batter light and airy. I dare you to taste this and not go back for seconds. The batter incorporates buttermilk, which adds a subtle tang that balances the sweetness, while the baking soda and powder give it that unmistakable lift.
Most recipes get this completely wrong. They either overmix the batter, causing dense pancakes, or they underbake the filling, leaving the glaze too runny. Here, I’ve cracked the code: fold the batter gently, bake the filling until it’s just set, and finish with a glaze that hardens into a glossy finish. If you’ve ever struggled with fluffy pancakes, you’re not alone—and I’ve got the fix that will change your mornings forever. Let me walk you through every single step—by the end, you’ll wonder how you ever made it any other way.
What Makes This Version Stand Out
- Taste: The combination of buttermilk, brown sugar, and fresh cinnamon creates a depth that feels both sweet and savory. The glaze adds a buttery sweetness that clings to each bite, making every mouthful a new experience.
- Texture: The batter rises like a cloud thanks to the precise balance of baking powder and soda, while the filling remains silky without becoming soggy. The result is a pancake that’s both airy inside and crisp on the edges.
- Simplicity: Only 18 ingredients, most of which you already have in your pantry. No need for fancy equipment—just a skillet and a whisk.
- Uniqueness: The recipe transforms a classic cinnamon roll into a breakfast staple, blending the best of both worlds. It’s a game‑changer for anyone who loves comfort food.
- Crowd Reaction: Friends and family rave about the fluffiness and the melt‑in‑your‑mouth glaze. It’s the kind of dish that turns a simple gathering into a memorable feast.
- Ingredient Quality: Using real cream cheese and unsalted butter elevates the flavor profile. The quality of the butter especially makes a noticeable difference in the glaze’s sheen.
Alright, let's break down exactly what goes into this masterpiece...
Inside the Ingredient List
The Flour Factor
All-purpose flour is the backbone of this batter. It provides the structure needed for the pancakes to rise without becoming tough. If you use cake flour, the pancakes will be too soft and might collapse. For a gluten‑free version, replace with a 1:1 blend of rice flour and potato starch, but add a pinch of xanthan gum to maintain elasticity.
The Sweet Core
Granulated sugar, brown sugar, and powdered sugar work together to create layers of sweetness. The granulated sugar sweetens the batter, while the brown sugar in the filling adds depth and caramel notes. The powdered sugar glaze finishes the dish with a silky finish. If you prefer a lower‑sugar option, swap the powdered sugar for a light honey drizzle.
The Leavening Magic
Baking powder and soda are essential for lift. Baking powder alone gives a gentle rise, while the soda reacts with the buttermilk to produce a dramatic puff. Over‑baking these leaveners can cause a bitter taste, so measure them precisely. A small pinch of salt balances the sweetness and enhances the overall flavor profile.
The Creamy Finish
Cream cheese adds a tangy richness that contrasts the sweet batter. It also thickens the glaze, giving it a glossy sheen. If you’re vegan, substitute with a dairy‑free cream cheese and use plant‑based butter for the glaze. The final drizzle of milk helps the glaze spread evenly across the pancakes.
Everything's prepped? Good. Let's get into the real action...
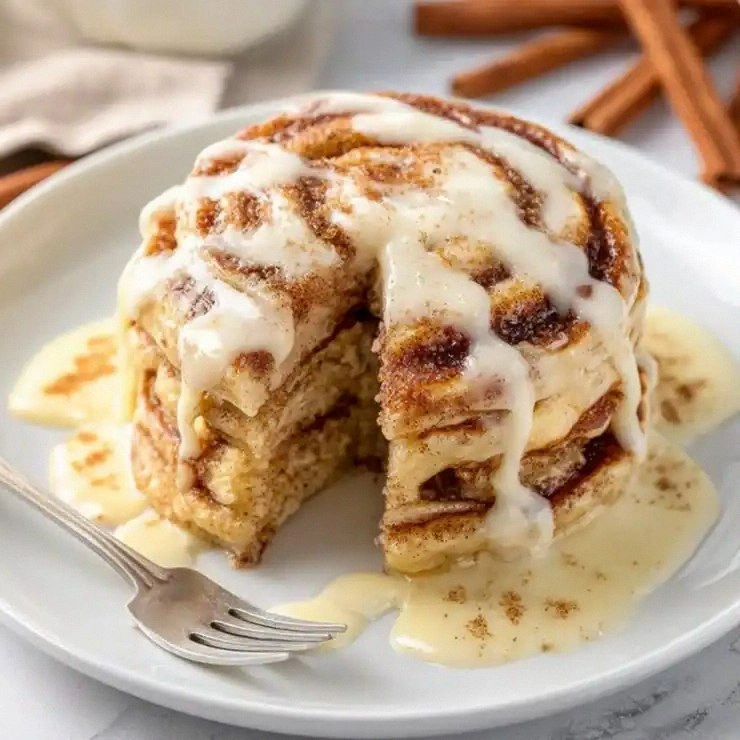
The Method — Step by Step
- In a medium bowl, whisk together flour, sugar, baking powder, baking soda, and salt until the mixture is even. The dry mix should feel like fine sand. This step ensures that leaveners are evenly distributed. Don’t skip it; uneven distribution leads to uneven rise.
- In a separate bowl, combine buttermilk, egg, melted butter, and vanilla extract. Beat until the mixture is smooth. The buttermilk’s acidity reacts with the leaveners, giving the batter a tender crumb. If you’re short on time, a quick whisk will do the trick.
- Pour the wet ingredients into the dry mixture and stir just until combined. It’s okay if the batter looks a bit lumpy; over‑mixing will develop gluten and make the pancakes dense. The batter should be thick but pourable. If it’s too thick, add a splash of milk.
- Heat a non‑stick skillet over medium‑low heat and brush lightly with butter. The skillet should be hot enough that a drop of water sizzles, but not so hot that the butter burns. A properly heated skillet is critical for even cooking.
- Pour about ¼ cup of batter onto the skillet for each pancake. Spread gently with a spatula to form a round shape. The pancakes should be about 6 inches in diameter for the best texture. Watch for bubbles forming on the surface.
- Cook until the edges look set and the top has small bubbles, about 2‑3 minutes. Flip carefully with a wide spatula. The golden brown color signals that the pancake is ready to flip. If you flip too early, the pancake will be raw inside.
- Reduce heat to medium and cook the second side until golden, about 2 minutes. This ensures the pancakes are cooked through without burning the outside. The inside should be warm and fluffy. Flip only once to keep the texture intact.
- While the pancakes finish cooking, prepare the filling. In a small saucepan, melt 3 tablespoons of butter over low heat. Add the brown sugar and cinnamon; stir until the sugar dissolves. This filling will be drizzled over the pancakes for that classic cinnamon roll flavor.
- Once the pancakes are done, lay them flat on a plate and spoon the warm filling over each. The heat from the pancakes will melt the filling slightly, creating a gooey center. Let the filling sit for a minute to set.
- Whisk the cream cheese, powdered sugar, vanilla extract, and milk together until smooth. This glaze should be pourable but thick enough to coat the pancakes. Drizzle the glaze over the filled pancakes, letting it cascade down the sides.
- Serve immediately while the pancakes are still warm. The glaze will be silky and the filling will still be warm. A plate of these will disappear before you know it. The final touch is a dusting of extra powdered sugar for an elegant finish.
That's it — you did it. But hold on, I've got a few more tricks that'll take this to another level...
Insider Tricks for Flawless Results
The Temperature Rule Nobody Follows
The skillet’s temperature is the secret to a perfect pancake. If it’s too hot, the pancakes brown too fast and stay raw inside. If it’s too low, they spread too much and lose their shape. Use a thermometer or drop a pinch of flour; if it sizzles, the heat is just right.
Why Your Nose Knows Best
Smell is a powerful indicator of doneness. When the batter starts to bubble and the edges lift, the scent of cinnamon and butter should be unmistakable. Trust that aroma; it signals the pancake is ready for the flip.
The 5‑Minute Rest That Changes Everything
Letting the batter sit for 5 minutes before cooking allows the flour to fully hydrate and the leaveners to activate. The result is a batter that’s silky and airy. I once skipped this step and ended up with dense pancakes—lesson learned.
The Cream Cheese Trick
Using room‑temperature cream cheese in the glaze prevents clumps. Chill the glaze for 10 minutes if it’s too runny. The glaze will set into a glossy finish, making each bite look as good as it tastes.
The Milk Adjustment
Adding a splash of milk to the glaze thickens it without making it too syrupy. If you prefer a thicker glaze, use a 1:1 ratio of powdered sugar to milk. This small tweak can elevate the overall mouthfeel.
Creative Twists and Variations
This recipe is a playground. Here are some of my favorite ways to switch things up:
Nutty Cinnamon Roll
Add chopped walnuts or pecans to the batter for crunch. Toast the nuts before mixing to enhance flavor. They pair wonderfully with the creamy glaze.
Maple‑Infused
Replace half of the milk in the glaze with pure maple syrup. The syrup adds depth and a subtle caramel note. It also gives the glaze a richer color.
Spiced Variation
Add a pinch of nutmeg and a dash of ground ginger to the batter. The spices complement the cinnamon and create a warm, holiday‑like aroma. This is perfect for a cozy brunch.
Berry Burst
Fold fresh blueberries or sliced strawberries into the batter before cooking. The fruit will burst when heated, adding a juicy surprise. Pair with a dollop of whipped cream for extra indulgence.
Chocolate Swirl
Swirl a drizzle of melted chocolate into the batter before pouring it onto the skillet. The chocolate will melt into a swirl inside each pancake. This is a hit with kids and chocolate lovers alike.
Vegan Version
Use a dairy‑free butter alternative and plant‑based cream cheese. Replace the egg with a flaxseed “egg” or a commercial egg replacer. The texture remains light and fluffy, and the flavor stays true.
Storing and Bringing It Back to Life
Fridge Storage
Store leftovers in an airtight container for up to 3 days. Reheat in a toaster oven or microwave for 30 seconds. The pancakes will retain their fluffiness if you cover them with foil to keep moisture.
Freezer Friendly
Freeze individual pancakes on a parchment‑lined tray until solid, then transfer to a freezer bag. They can be stored for up to 2 months. Reheat on a skillet over low heat until warm; the glaze will stay glossy.
Best Reheating Method
Add a tiny splash of water to the pan before reheating to create steam. This steams the pancakes back to softness without drying them out. Finish with a quick drizzle of glaze for that fresh finish.