It all started on a rainy Saturday when I tried to rescue a half‑baked pumpkin loaf that had turned into a dry brick. I was halfway through a marathon of Netflix, the kitchen smelled like burnt toast, and my friend dared me to make something that would actually make people forget about the disaster. I stared at the sad, crumbly mess and thought, “If I can’t fix this, I’ll create the ultimate pumpkin bread that makes even the toughest critic weep with joy.” That moment sparked a relentless quest for the perfect balance of moisture, spice, and that comforting autumnal hug you crave on a chilly evening.
The kitchen soon filled with the sweet, earthy aroma of pumpkin mingling with cinnamon, nutmeg, and ginger, each spice dancing like a firefly in twilight. I could hear the gentle whisking of the batter, the soft thud of eggs cracking, and the faint sizzle when the batter finally kissed the hot pan. My hands felt the smooth, oily texture of the mixture, promising a tender crumb, while the warm air brushed against my skin, carrying whispers of fall markets and pumpkin patches. The whole experience was a sensory symphony that made my heart race faster than a whisk on high speed.
What sets this version apart is a handful of seemingly tiny tweaks that turn an ordinary loaf into a legend. I’m talking about a secret splash of oil that keeps the crumb moist for days, a precise ratio of sugars that creates a caramelized crust without turning it into a candy bar, and a gentle folding technique that preserves the airy lift you get from the eggs. Most recipes get this completely wrong – they either over‑mix, under‑sweeten, or forget the crucial step of letting the batter rest before baking. This one? It’s hands down the best version you’ll ever make at home, and I’m about to prove it.
There’s also a surprise ingredient that most pumpkin bread lovers overlook: a pinch of baking powder alongside baking soda. This dynamic duo creates an internal steam engine that pushes the batter up, giving you a lofty crumb that’s as light as a cloud but still dense enough to hold all that pumpkin goodness. I dare you to taste this and not go back for seconds – the combination of flavors and texture is pure, unadulterated comfort.
Let me walk you through every single step — by the end, you’ll wonder how you ever made it any other way. Okay, ready for the game‑changer? Keep reading, stay with me, and prepare to become the pumpkin bread hero of your own kitchen.
What Makes This Version Stand Out
- Moisture: The blend of vegetable oil and two types of sugar creates a tender crumb that stays soft for over a week, even without refrigeration.
- Flavor Depth: A balanced trio of cinnamon, nutmeg, and ginger delivers a spice profile that’s warm without being overpowering.
- Simplicity: Only thirteen ingredients, all pantry staples, mean you won’t need a specialty store run.
- Texture Harmony: The dual leavening (baking soda + baking powder) gives a lofty rise while keeping the crumb dense enough to hold the pumpkin puree.
- Crowd Reaction: People often say it tastes like “a hug from grandma” and they’ll keep asking for the recipe.
- Ingredient Quality: Using pure pumpkin puree (not canned pumpkin pie filling) preserves the natural sweetness and bright orange hue.
- Cooking Method: Baking at a moderate 350°F with a preheated pan ensures an even bake and a golden crust.
- Make‑Ahead Potential: This loaf freezes beautifully; slice, wrap, and you’ve got a ready‑to‑toast snack for any time.
Alright, let's break down exactly what goes into this masterpiece...
Inside the Ingredient List
The Flavor Base
The star of the show is the pure pumpkin puree. It brings natural sweetness, moisture, and that iconic orange color. Choose a puree that’s 100% pumpkin with no added sugars or spices for the cleanest flavor. If you skip it, you’ll end up with a bland, dry loaf that lacks the signature pumpkin punch. A good swap is canned pumpkin puree, but be sure to drain any excess liquid to avoid a soggy crumb.
Next up, the trio of spices: ground cinnamon, ground nutmeg, and ground ginger. Cinnamon adds warmth, nutmeg contributes a subtle earthiness, and ginger injects a bright, slightly peppery bite. Together they create a harmonious spice chorus that sings with each bite. If you’re allergic to nutmeg, a pinch of allspice works as a stand‑in without compromising the flavor profile.
The Texture Crew
All‑purpose flour provides the structural backbone. The 1.75 cups give enough gluten to hold the loaf together while still allowing it to stay tender. For a gluten‑free version, substitute with a 1:1 gluten‑free flour blend and add a tablespoon of xanthan gum.
Vegetable oil is the secret moisture keeper. Unlike butter, oil stays liquid at room temperature, ensuring the crumb never dries out. If you prefer a buttery flavor, you can replace half the oil with melted unsalted butter, but keep the other half as oil to retain that melt‑in‑your‑mouth quality.
The Unexpected Star
The combination of baking soda and baking powder is the hidden engine. Baking soda reacts with the acidity of the pumpkin and brown sugar, creating bubbles that lift the batter. Baking powder adds an extra push, guaranteeing a consistent rise even if your pumpkin puree is on the milder side. Skipping either will result in a denser loaf that lacks that airy lift.
The Final Flourish
Both granulated sugar and brown sugar play distinct roles. Granulated sugar sweetens evenly, while brown sugar adds a subtle molasses note and contributes to a moist crumb. The eggs provide structure and richness; three large eggs are enough to bind everything together without making the loaf too heavy. Finally, the optional chopped nuts add a crunchy contrast that elevates the texture, but the bread is spectacular even without them.
Everything's prepped? Good. Let's get into the real action...
The Method — Step by Step
Preheat your oven to 350°F (175°C) and position the rack in the middle. While the oven warms, grease a 9×5‑inch loaf pan with a thin layer of oil and line the bottom with parchment paper. This ensures a clean release and a golden crust that doesn’t stick. The pan should feel warm to the touch when you place the batter in – that’s a good sign the oven is truly preheated.
In a large mixing bowl, whisk together the flour, baking soda, baking powder, and salt. This dry blend is crucial; it distributes the leavening agents evenly, preventing pockets of bitterness. As you whisk, you’ll hear a faint rustling sound that signals the ingredients are fully incorporated.
Kitchen Hack: Sift the dry ingredients once to aerate them and avoid lumps.In a separate bowl, combine the vegetable oil, granulated sugar, and brown sugar. Beat with a handheld mixer on medium speed until the mixture turns glossy and the sugars start to dissolve. This process creates a fine, creamy base that will later coat the flour particles, locking in moisture. You’ll notice a faint caramel scent forming – that’s the sugar beginning its magic.
Add the eggs one at a time, beating well after each addition. The batter should become thicker and slightly lighter in color. Follow with the vanilla extract, which adds a subtle aromatic depth that complements the pumpkin. If you’re feeling adventurous, a splash of bourbon can amplify the warm notes, but keep it under a tablespoon.
Now gently fold in the pumpkin puree and the spice blend (cinnamon, nutmeg, ginger). Use a rubber spatula and a gentle folding motion – you want to incorporate without over‑mixing. The batter should look thick, velvety, and a deep orange hue that’s almost hypnotic. At this point, the scent will fill the kitchen like a cozy blanket.
Gradually add the dry flour mixture to the wet ingredients, stirring just until you see no streaks of flour. Over‑mixing here would develop gluten and make the bread tough, so stop as soon as the batter looks uniform. This step is the most delicate – think of it as coaxing two shy friends together.
If you’re using chopped nuts, fold them in now. They should be evenly distributed, creating little pockets of crunch throughout the loaf.
Watch Out: Adding nuts too early can cause them to sink; fold them in at the very end to keep them afloat.Pour the batter into the prepared loaf pan, smoothing the top with the back of a spoon. Tap the pan gently on the counter three times – this releases any trapped air bubbles and settles the batter evenly. The surface should be slightly domed; it will flatten as it bakes, forming a beautiful crown.
Slide the pan into the oven and bake for 30‑35 minutes. About 25 minutes in, rotate the pan 180 degrees to ensure even browning. The loaf is done when a toothpick inserted into the center comes out clean, or with just a few moist crumbs clinging. The edges will start pulling away from the pan, and the top will be a deep golden brown that smells like a fall market.
Remove the loaf from the oven and let it cool in the pan for 10 minutes, then transfer to a wire rack. This resting period allows the steam to finish cooking the interior, guaranteeing that melt‑in‑your‑mouth texture. While it cools, the kitchen will be filled with an intoxicating aroma that makes you want to dive right in. And now the fun part – slicing!
That's it — you did it. But hold on, I've got a few more tricks that'll take this to another level...
Insider Tricks for Flawless Results
The Temperature Rule Nobody Follows
Always let your batter sit at room temperature for 10‑15 minutes before baking. This small pause lets the flour fully hydrate, creating a smoother crumb and preventing a gummy interior. I once rushed straight from mixing to oven, and the loaf turned out dense – a lesson learned the hard way. Trust the rest period; it’s the silent hero behind that pillow‑soft texture.
Why Your Nose Knows Best
Don’t rely solely on a timer. When the loaf is about 5 minutes from the end, lean in and inhale deeply. If you detect a sweet, nutty aroma with a hint of caramel, the bread is ready. If the scent is still faint, give it an extra minute. Your nose is a built‑in doneness detector that no thermometer can beat.
The 5‑Minute Rest That Changes Everything
After removing the loaf from the pan, let it rest uncovered on a wire rack for exactly five minutes before slicing. This short pause allows the steam to escape, preventing the crumb from becoming soggy. I’ve seen bakers slice immediately and end up with a gummy slice that sticks to the knife – avoid that embarrassment.
Nut Placement Mastery
If you love the crunch of nuts, toast them lightly in a dry skillet for 3‑4 minutes before folding them in. Toasted nuts release oils, adding a deeper flavor and a crunch that stays crisp even after a week of storage. A friend once added raw nuts, and they turned soggy; the toast step fixes that.
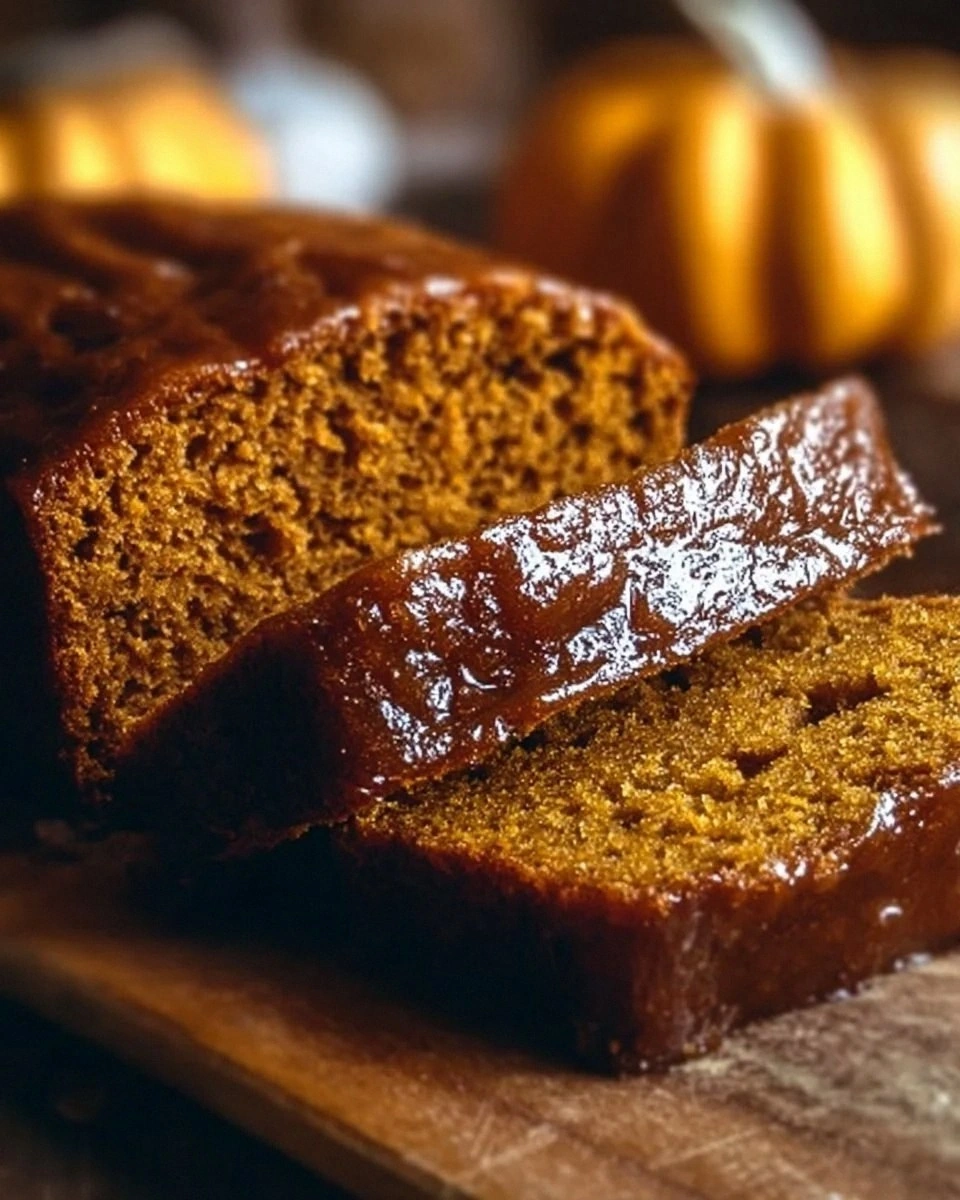
Glaze for the Win
A quick glaze of powdered sugar mixed with a splash of orange juice adds a glossy finish and a subtle citrus lift that brightens the spice profile. Brush it on while the loaf is still warm so the glaze seeps in just enough to create a thin, crackly crust. This final touch turns a great loaf into a show‑stopper.
Creative Twists and Variations
This recipe is a playground. Here are some of my favorite ways to switch things up:
Chocolate Swirl
Fold in ½ cup of melted dark chocolate and a tablespoon of cocoa powder for a mocha‑pumpkin hybrid. The bitterness of chocolate balances the sweet spices, creating a sophisticated flavor that’s perfect for brunch.
Maple Walnut
Replace the vanilla with 2 tablespoons of pure maple syrup and swap the optional nuts for toasted walnuts. The maple adds a caramel depth that pairs beautifully with the earthy pumpkin.
Spicy Kick
Add a pinch of cayenne pepper or a dash of chili powder to the spice blend for a subtle heat that surprises the palate. It’s a daring twist that works especially well with a cream cheese frosting.
Apple‑Cinnamon Fusion
Mix in ½ cup of finely grated apple and an extra teaspoon of cinnamon. The apple adds moisture and a fresh fruit note, turning the loaf into a hybrid between pumpkin and classic apple bread.
Gluten‑Free Glory
Swap the all‑purpose flour for a 1:1 gluten‑free flour blend and add 1 tablespoon of xanthan gum. The result is a loaf that’s just as moist, with a tender crumb that satisfies gluten‑free cravings.
Storing and Bringing It Back to Life
Fridge Storage
Wrap the cooled loaf tightly in plastic wrap or store it in an airtight container. It will stay fresh for up to 5 days in the refrigerator. The moisture‑locking oil ensures it doesn’t dry out, and the spices mellow beautifully over time.
Freezer Friendly
Slice the bread before freezing, then place the slices in a zip‑top freezer bag, separating layers with parchment paper. Freeze for up to 3 months. When you’re ready to enjoy, toast directly from frozen – the crust will crisp up instantly.
Best Reheating Method
To revive a slice, sprinkle a tiny splash of water on the surface, then microwave for 15‑20 seconds or warm in a toaster oven at 350°F for 5 minutes. The added steam re‑hydrates the crumb, giving you that just‑baked sensation.